How to create Coil Sculptures while teaching a multicultural lesson.
18 Keeps,
6 Likes,
2 Comments
THE PLAN
8 sessions; 40 minutes per session
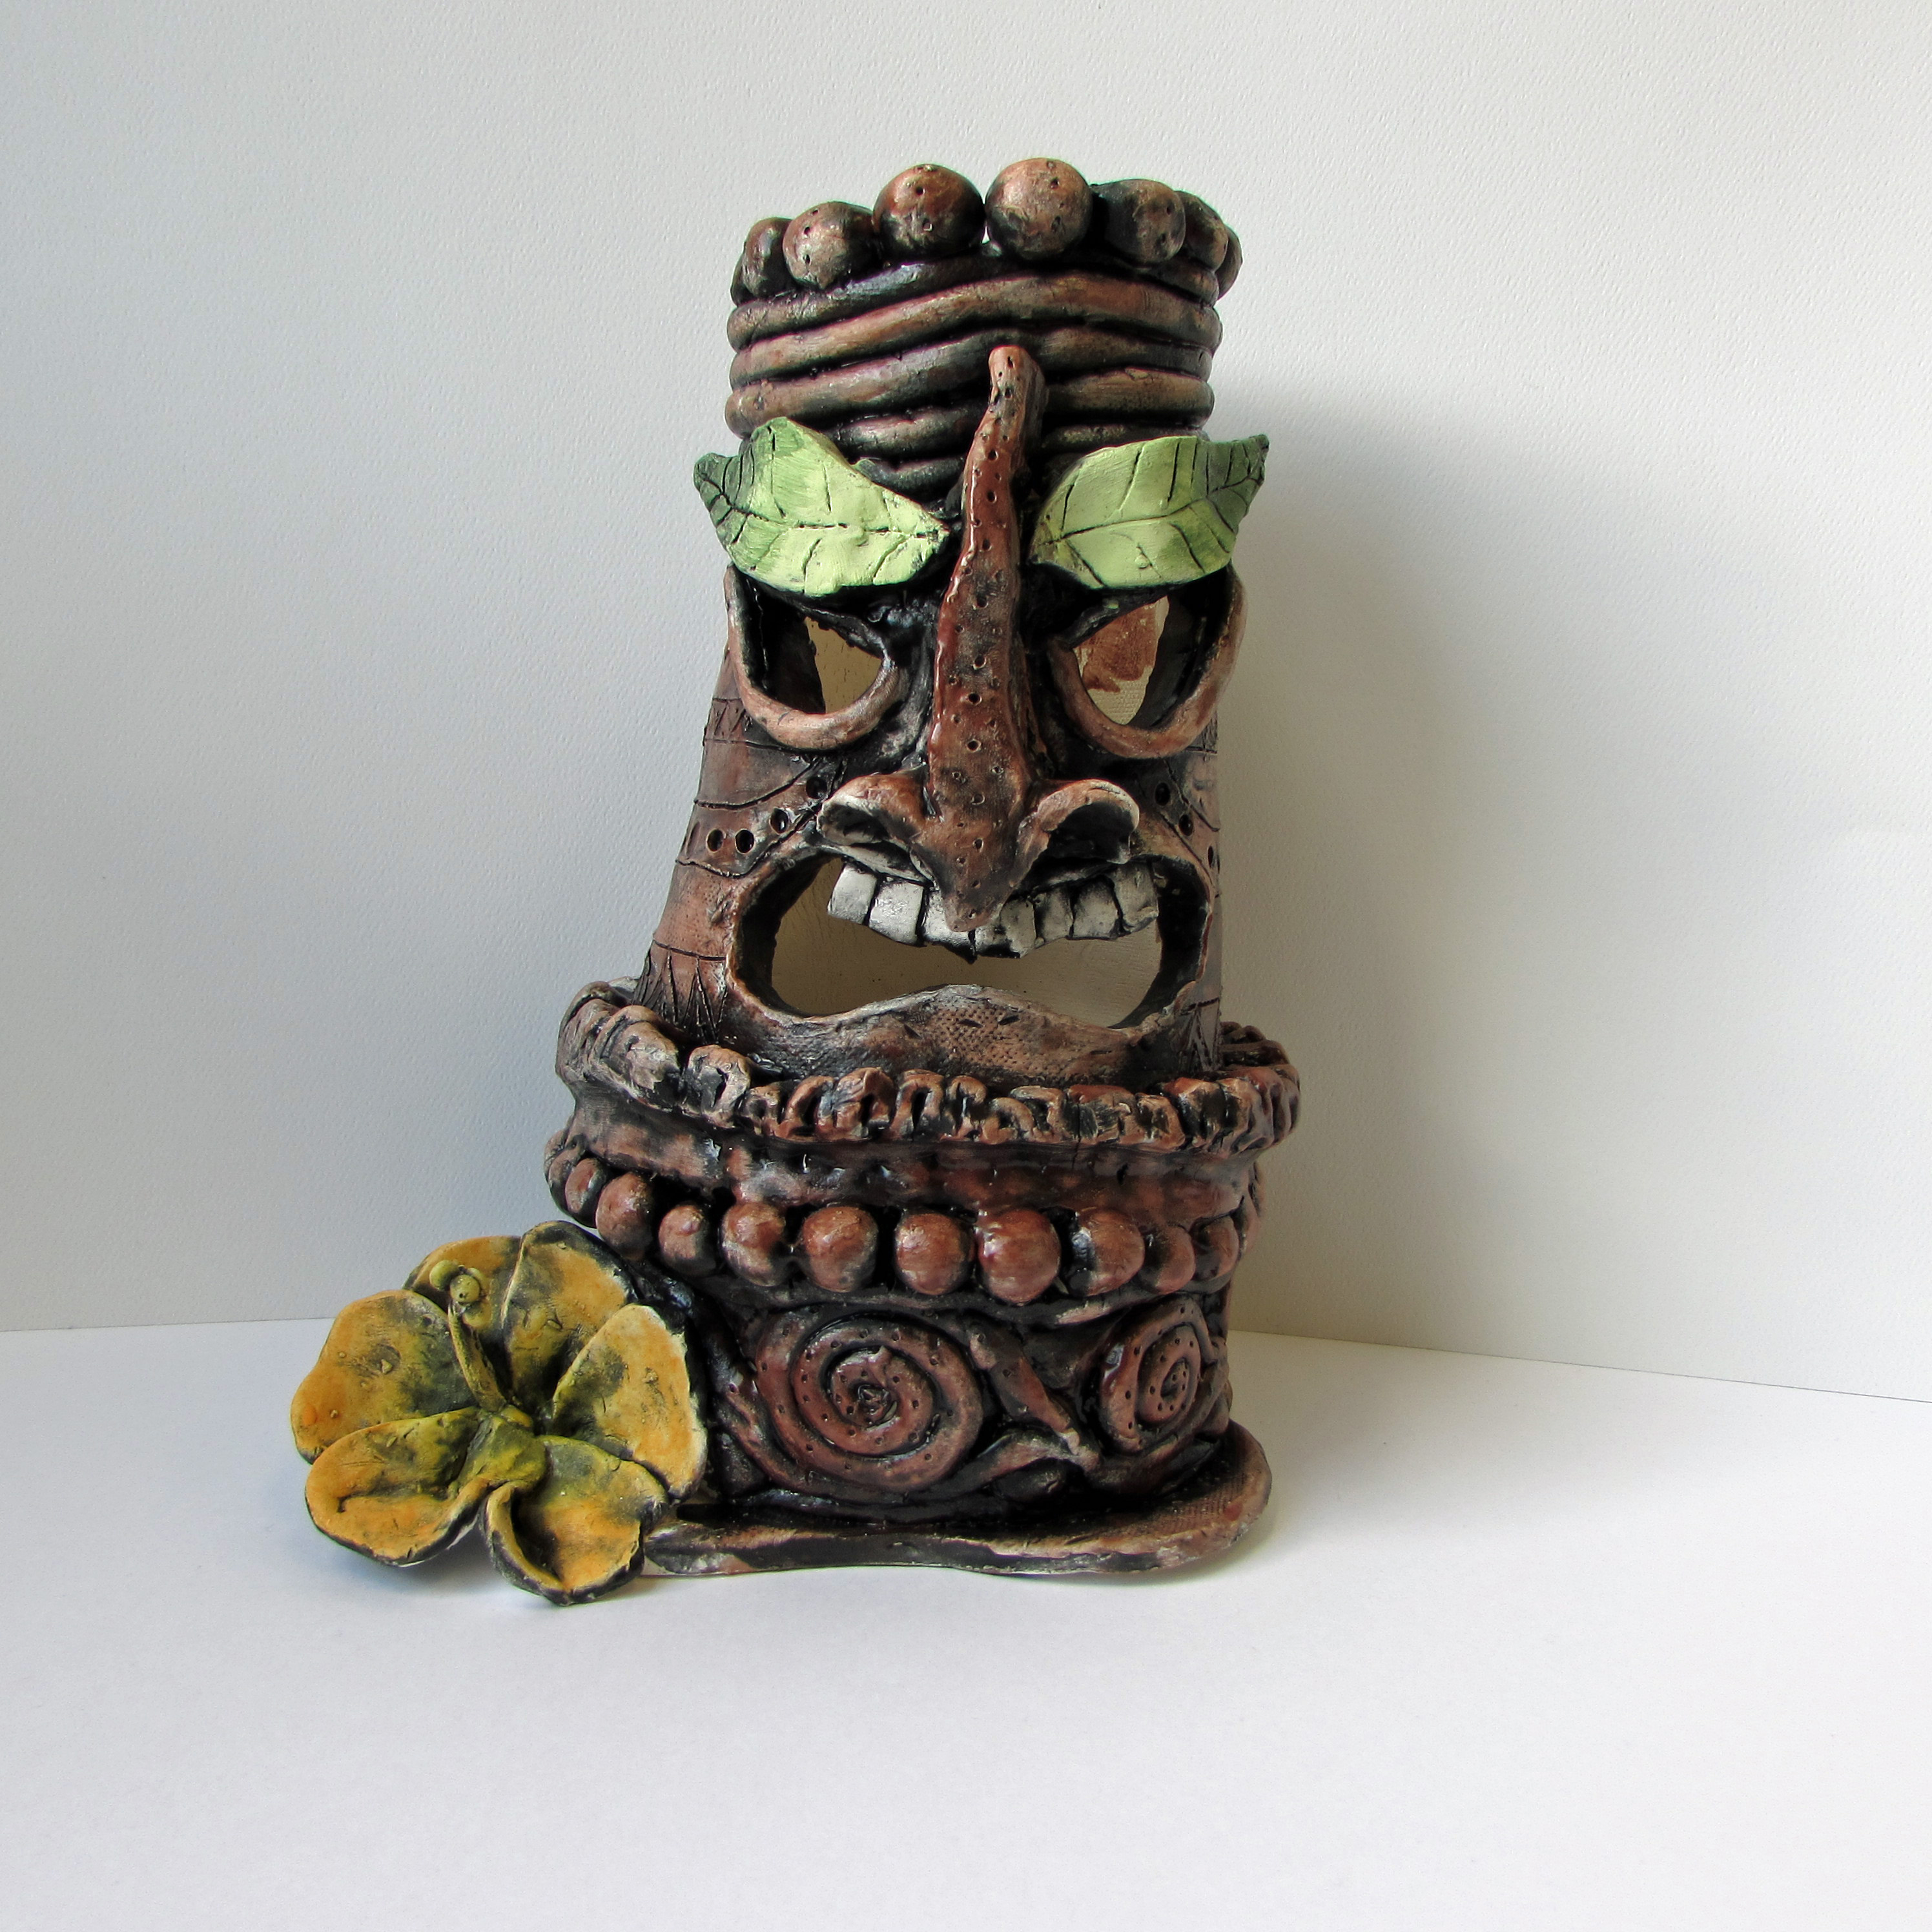
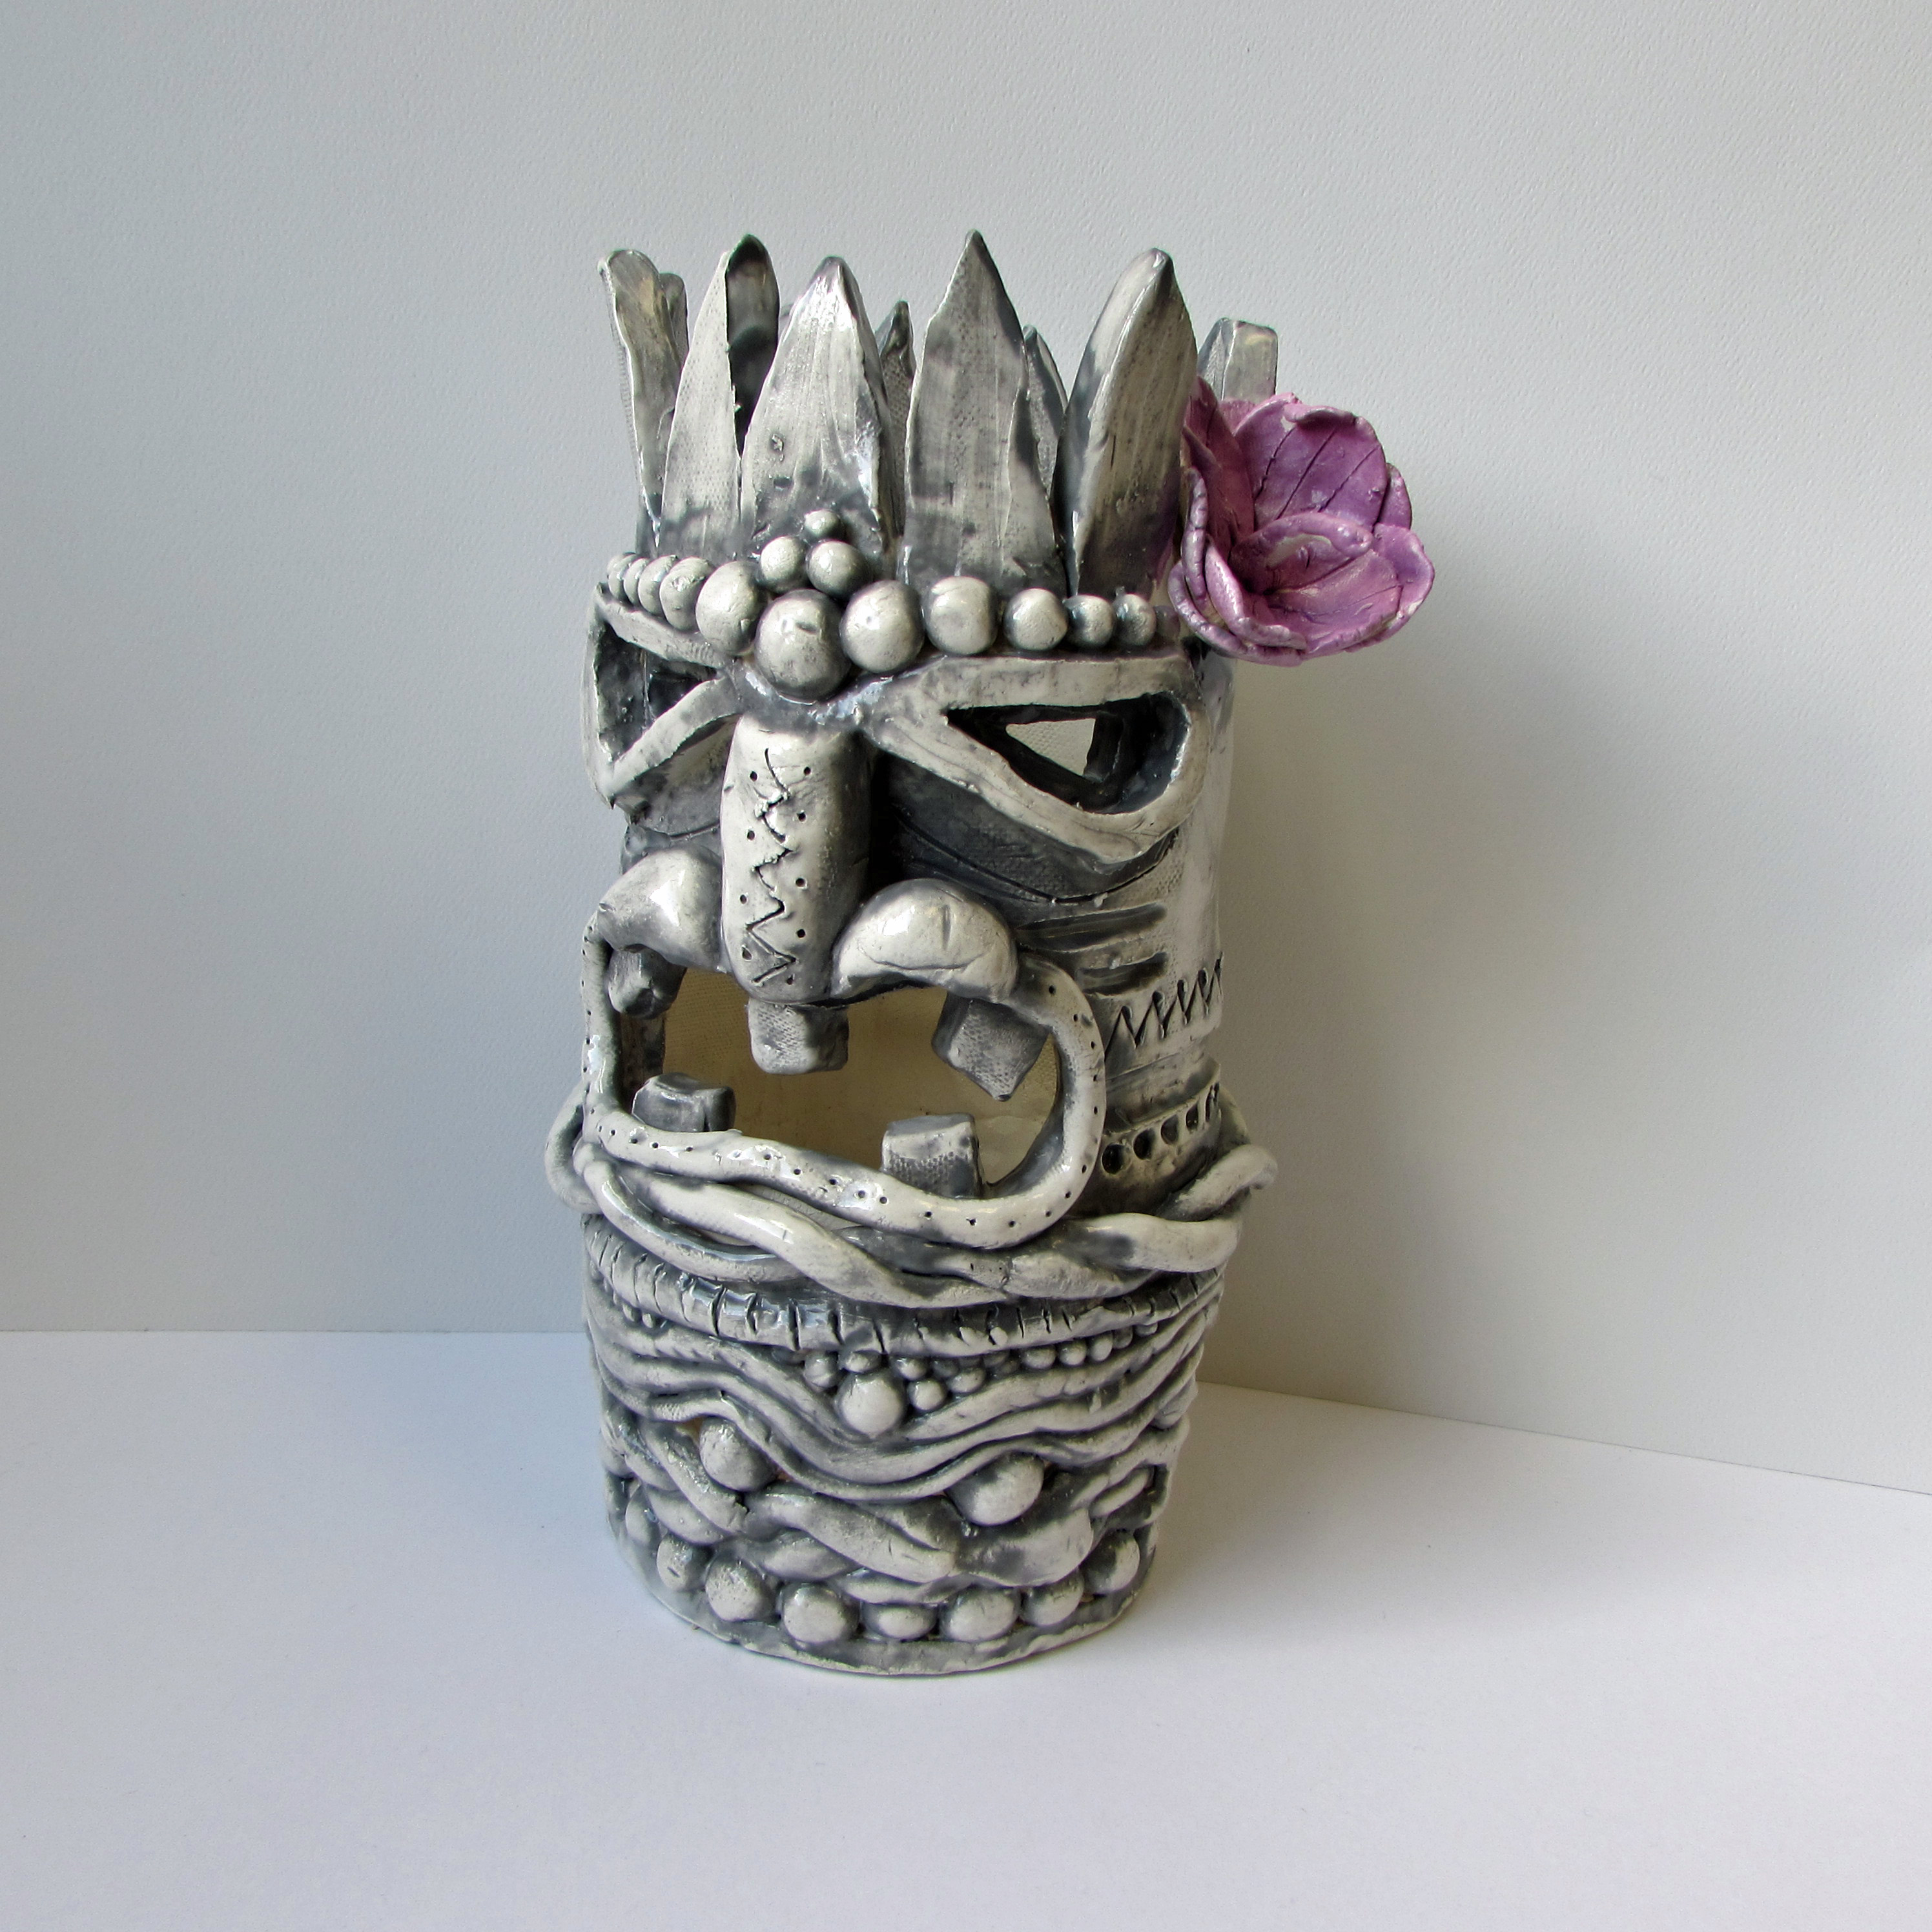
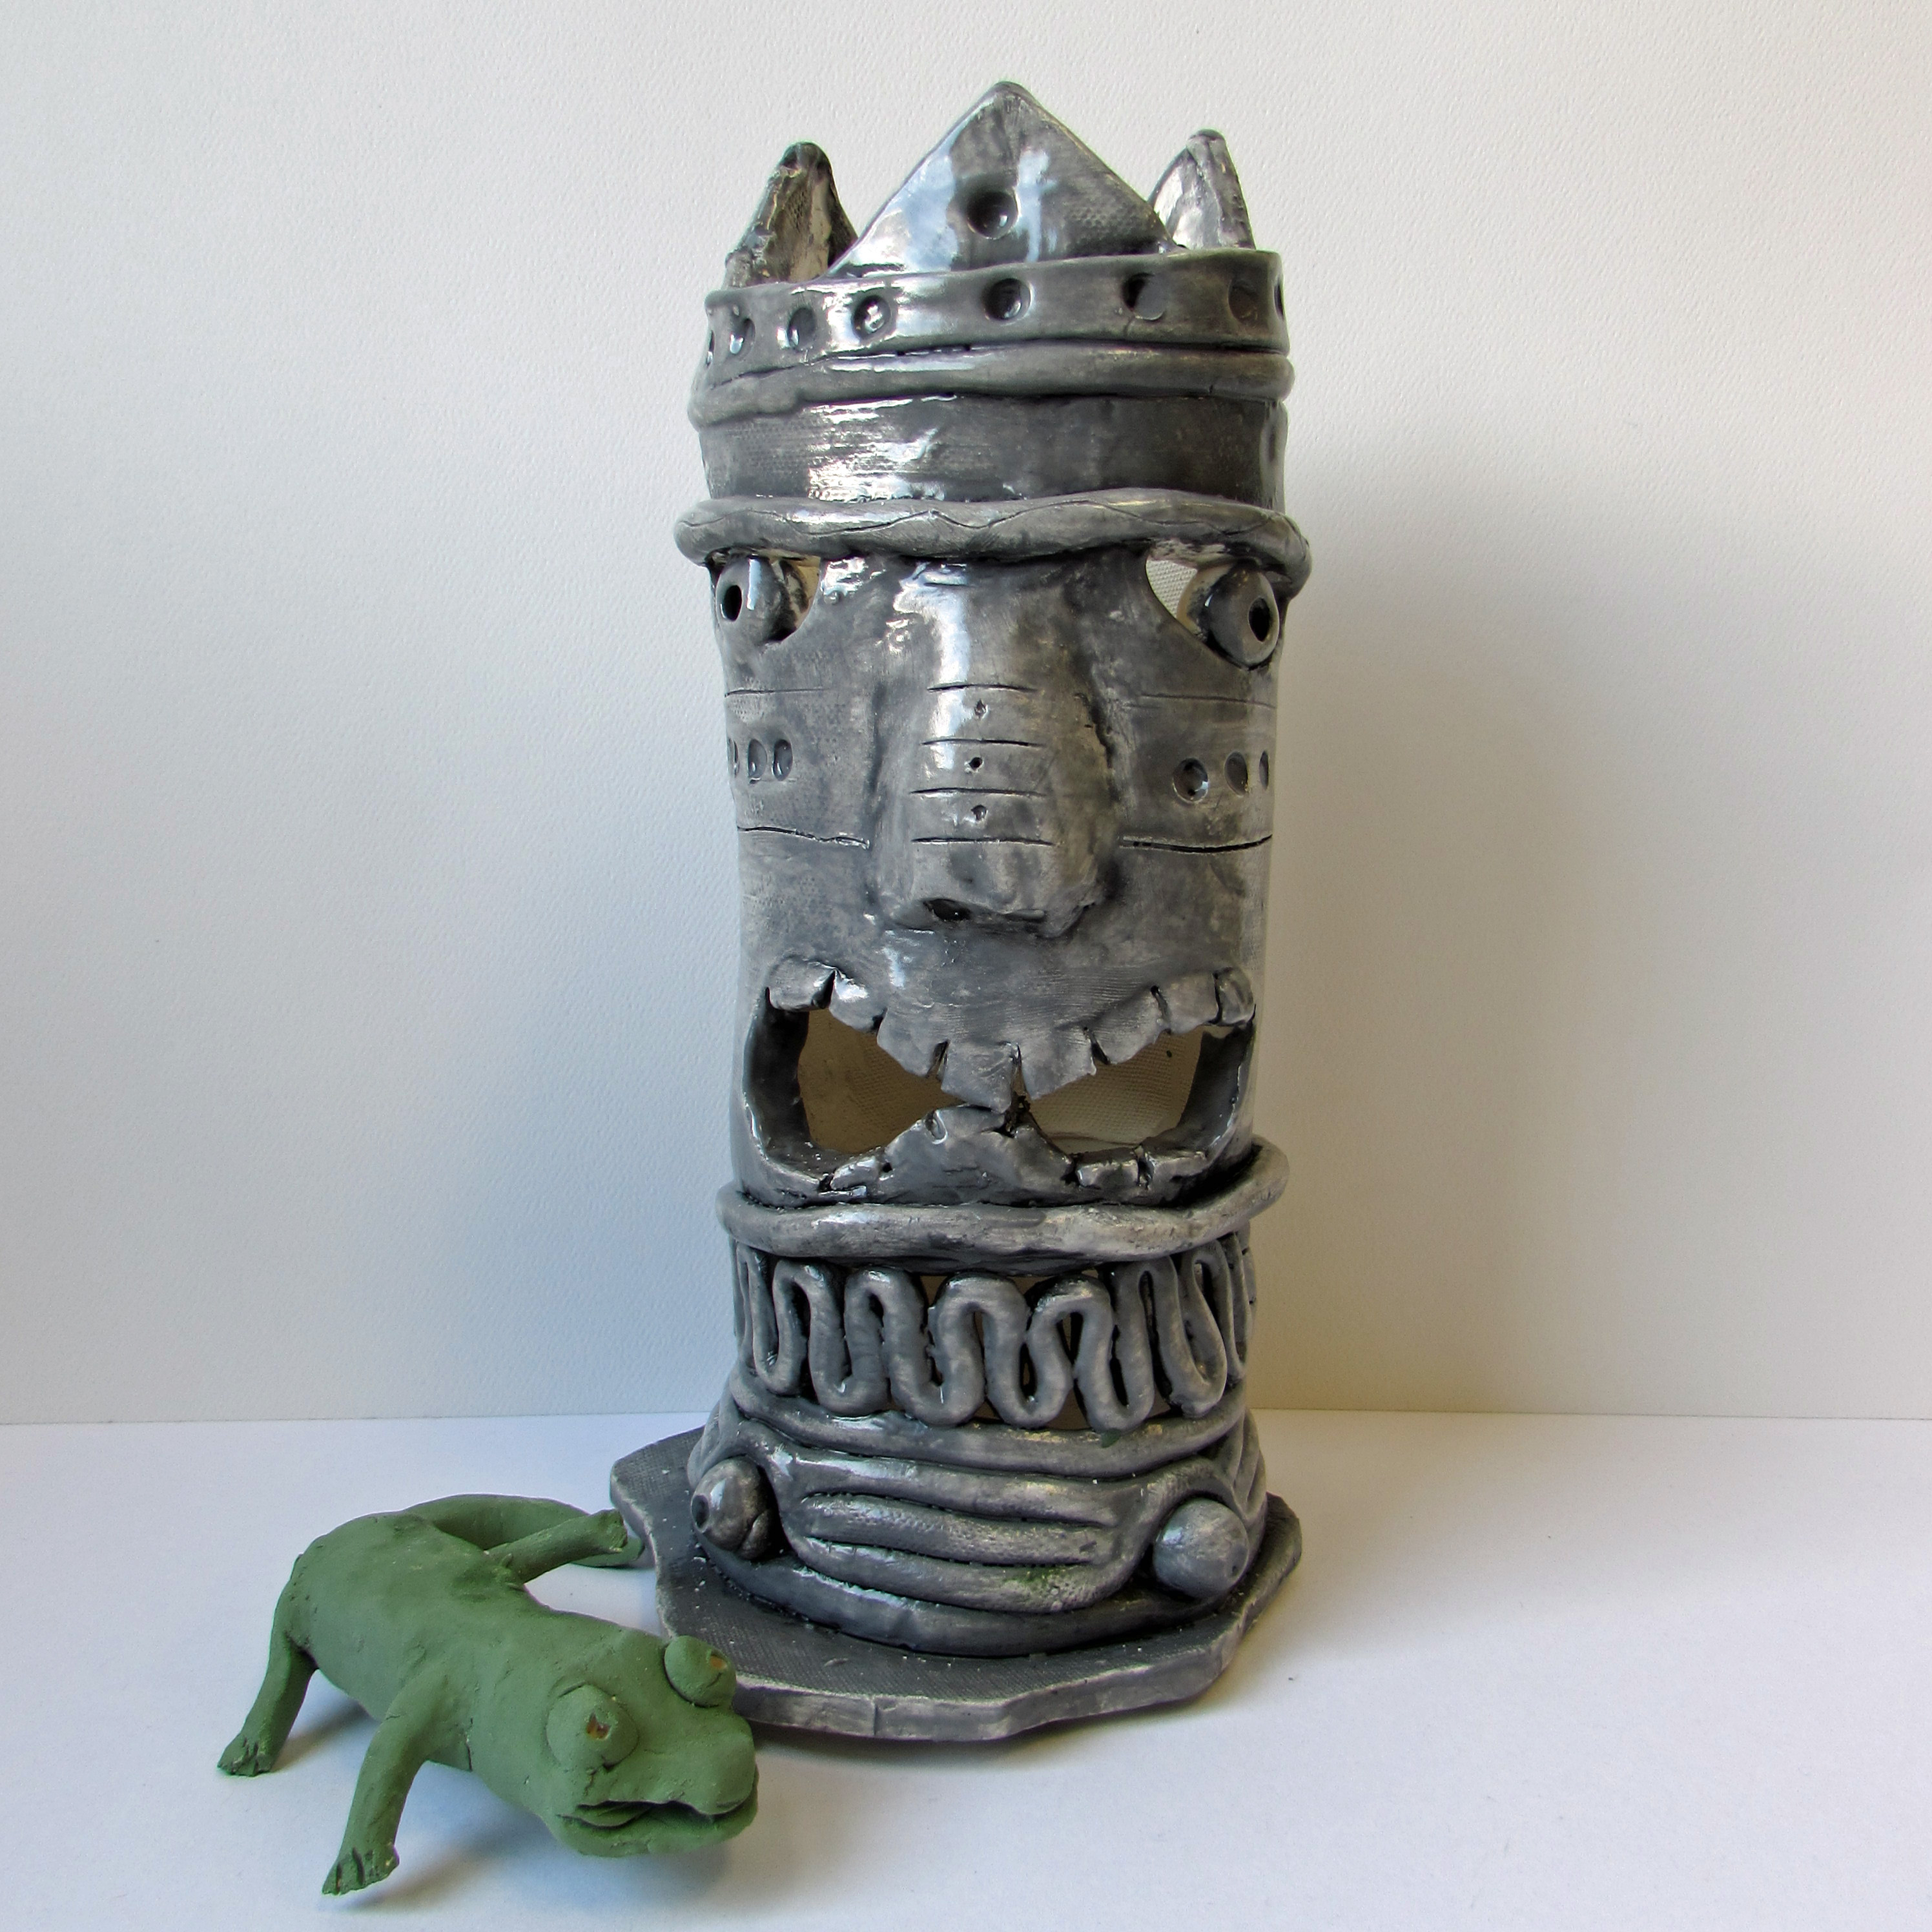
The student will be able to create coil and slab sculpture that is inspired by Polynesian culture.
The student will understand how to create multiple types of coils while using previous knowledge about the properties of clay.
The student will be able to add personal interest and culture to their piece through the use of symbols.
Clay, Handouts, Clay tools, examples, youtube video
1. Introduce the students to the Polynesian culture, discuss and find out previous knowledge.
2. Introduce the history of Tikis, and discuss the pop culture aspect of them.
3. Pass out reference and symbolic handouts and allow student s to sketch a tiki of their own.
4. Demonstrate slab roller and safety.
5. Create an organic or geometric shape for base.
6. Watch coil demonstration on how to create different types of coil work( single, double, twist, braid, shapes, beads,ribbon,fence.)
7. Students begin building base for tiki using their choice of coil design.
8. After desired height is constructed students roll a slab and using 45 degree angle cut it into a cylinder.Slip score and fuse onto base coil work and watch demonstration on how to sculpt features of the face.
9. After face is sculpted to show symbolism from the Polynesian culture, students will finish of the height of their piece by adding a "crown," or a finishing edge using coil work.
10. Students will then add at least one extra sculpture that represent Polynesian culture and at least on symbolism sculpture that represents their own culture.
11. Add names and dry out pieces to be fired.
12. Glaze using an under glazing technique where dark neutrals lay in the crack and lighter or clear glaze covers the surface( to achieve this result glaze the whole sculpture dark them sponge of the raised areas before apply final coats of top glaze.)
13. Finally add pops of color to accent extra and features.
14. Fire in kiln.
Class clay rubric, Teacher observation, and check for understandings.


Share!
Comment!