Fun sculpture project that allows for creativity and multiple construction processes in one project. Students choose a word and capture its idea in a 3D extrusion process.
15 Keeps,
1 Likes,
0 Comments
THE PLAN
8 sessions; 45 minutes per session
SWBAT define armature.
SWBAT extrude a form in cardboard.
SWBAT design a typographical composition.
SWBAT choose from a range or surface treatment options.
1. Paper ( for planning )
2. Pencil ( or some drawing material )
3. Cardboard
4. Tape ( good sticking masking tape works well )
5. Hot Glue ( optional if tape is not enough )
6. Plaster Gauze
7. Mod Podge ( if plaster gauze is not chosen )
8. Utility Knives ( for cutting cardboard )
9. Cutting mats
10. Acrylic Paint ( or other surface treatment options )
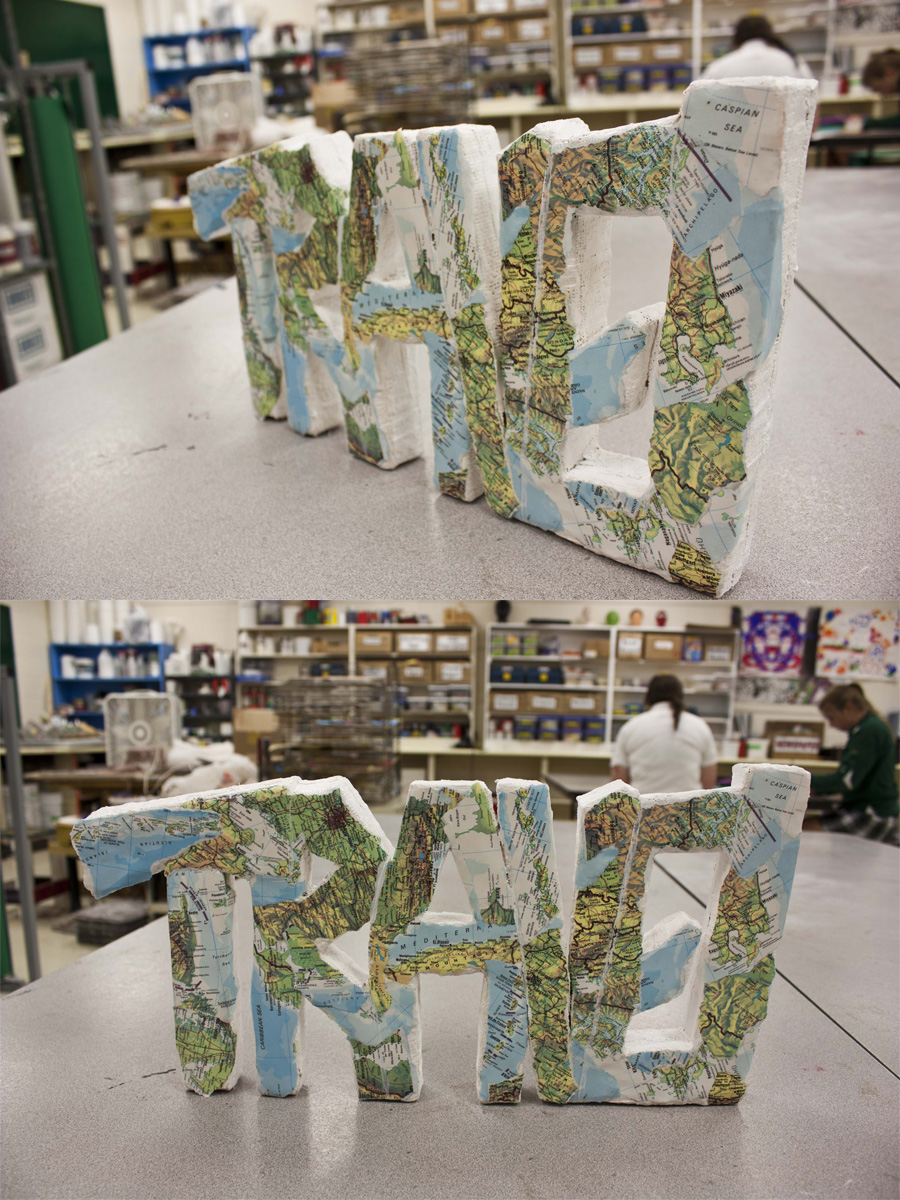
1. Select a word for project. (short words work better)
2. Design word composition on practice paper.
- be sure the letters connect in some way, the letters can overlap for stronger connection.
3. Redraw or transfer designed word to piece of cardboard.
- Typically I make the words be between 6 inches tall and 12 inches tall.
4. Cut out your word from the cardboard.
- you will need to facings or your word so you can either trace the 1st cut out word or transfer the word twice in the first place. One word will be the back facing and the other will be the front.
5. Cut long strips of cardboard for the side walls of the extruded word.
- It is very important that all the walls be the same width. We often do 2 to 3 inches for our wall widths.
- If you have curved letters it is very helpful to cut your long strips across the corrugation to allow for the cardboard to bend around curves.
6. Begin taping (or gluing) the walls to one of the words.
- it works best to place the walls on top of the words.
- be sure to make walls for the inside of letters like 'O', 'B', and so on.
7. Attach second word cut out to the top of the walls to complete our word extrusion armature.
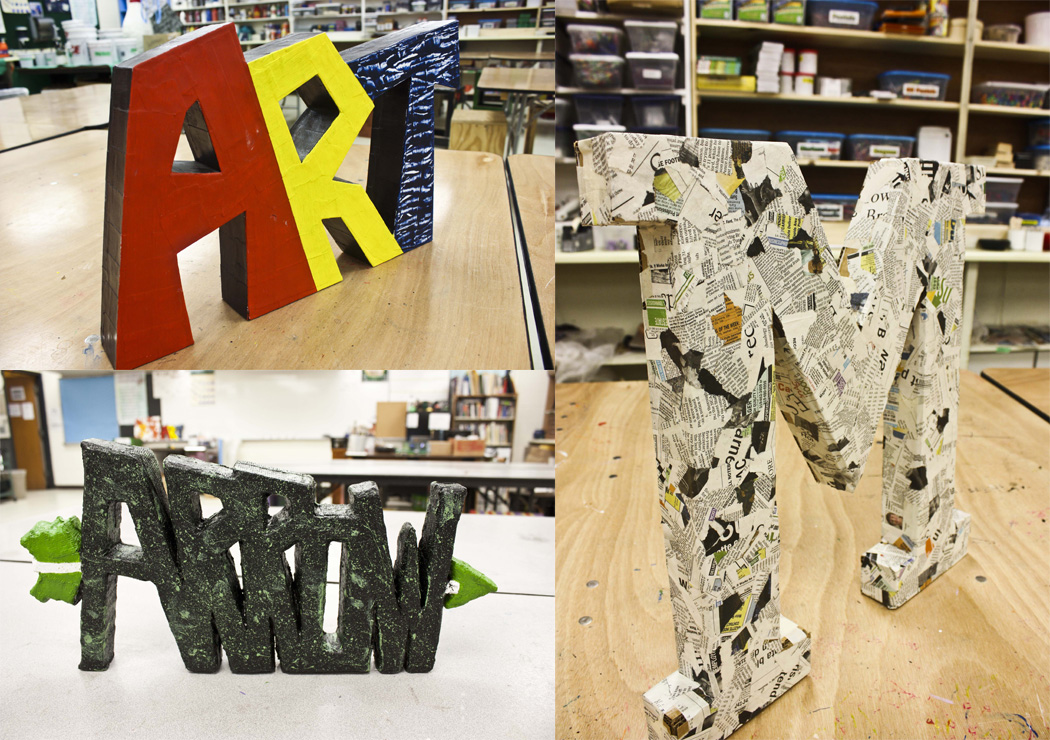
8. Now it is time to strengthen your word by adding a surface treatment.
- Most common surface treatment is plaster gauze.
- Alternative treatments include mod podging colored construction paper, magazines, newspaper, old book pages, ect to the outside.
9. Finally the student may add details to further express the meaning of their word with paint or other materials.
Students will be assessed based on the attached rubric.
There are a lot of steps to this project and I have completed in in many different ways each time depending on the abilities of my class. I have done simply one letter in the past to teach the construction process. Another alternative is to do a logo or symbol. If you have any questions on the construction process feel free to e-mail me!
THE STANDARDS
Visual Arts Standard 1: Understanding and applying media, techniques, and processes
[9-12 Proficient] Students conceive and create works of visual art that demonstrate an understanding of how the communication of their ideas relates to the media, techniques, and processes they use
[9-12 Proficient] Students apply media, techniques, and processes with sufficient skill, confidence, and sensitivity that their intentions are carried out in their artworks
Visual Arts Standard 2: Using knowledge of structures and functions
[9-12 Proficient] Students create artworks that use organizational principles and functions to solve specific visual arts problems
Visual Arts Standard 6: Making connections between visual arts and other disciplines
[9-12 Proficient] Students compare the materials, technologies, media, and processes of the visual arts with those of other arts disciplines as they are used in creation and types of analysis


Share!
Comment!