Here are my tips for creating plush in the classroom!
1. Have a concrete system for checking needles out and back in. You need to be able to quickly assess how many needles are missing (you don't want them to be "found" in the scrap heap!).
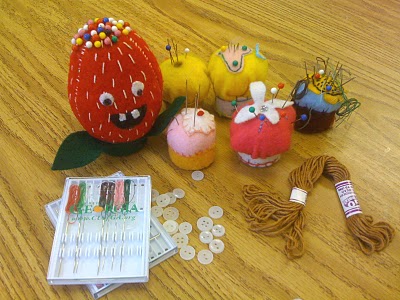
I use a pincushion system. Awhile back, I made a pincushion for each table. I place the number of needles needed per table in the pincushion, and when I collect, that number must be the same. I made cupcake pincushions using recycled materials and bottle-caps. If you want to make your own, click here to download the visual and written directions from my scribd account.
2. Ask for donated materials. Early-on.
You will go through a lot of fabric at first because it takes the kiddos a bit to really understand they can use the scrap fabric in 80% of situations. So, you will start with a lot of waste. You will be surprised at how many donations you will get. Donated materials can include: old sweatshirts (no fabrics that will fray), old felt, old flannel shirts/blankets, old wool felt, stuffing from old pillows etc. etc.
3. Recycle. Lots.
You will need a lot of materials with which to stuff your plush, and polyfil gets expensive. Save up paper for shredding, old dried beans, etc. etc, etc. for this. It is okay to offer students a variety of choices. Also, this year, a credit union gave all the teachers in my school a promotional travel sewing kit. I asked that any teacher who didn't want their kit to send it my way. And, done! I didn't need to purchase any needles!
4. Put on your "patience" hat.
Even though students know how to tie knots, when I ask them to tie a knot in the end of their thread, a panic sets in. And, no one can thread a needle. For real. Some will try, and some will try to get you to do it for them every time. Suddenly, no one has the confidence to know what to do! You will do a lot of re-teaching and confidence-building on a project like this. Reassure the students and encourage peer-mentor-ship.
5. Buy Fabri-Tac
Fabri-tac is too expensive to purchase for everyone to use, but it is a great tool to have in your back pocket for a "quick fix" (and you will have them).
6. Don't provide anything that isn't essential.
A plush project has students utilizing tools and creative methods that are new. Keep the new tools to a minimum. For instance, I don't provide needle-threaders for my students because I spend more time showing them how to use the threader than they spend trying to use it themselves. Students will avoid threading their needles without the threaders even when they don't know how to use the threader because it is "easier." Also, the threaders break very easily and that cost adds up. . .Once you have the students hooked on the threaders there are a lot of complaints when they disappear.
7. Have a needle/sharp-related injury plan and share it with the students.
You don't want any bloody needles to be put back out into the classroom supply. I tell students (and remind them constantly) to use their needles appropriately. . .And, then I tell that I will not be mad if they get hurt, but that they must let me now AT THAT MOMENT, NO MATTER WHAT. That way, I can get first-aid for the student, secure the contaminated materials, dispose of them, and keep everyone safe. The kids are great about this. And, I've only had one-to-two injuries and even then, they were just a pricking of a finger.
8. Build How-To Guides.
Build up a library of visual how-to guides for students to reference. You are only one set of hands and as such, cannot spend the class tying knots and threading needles as you will be needed in a variety of other ways (like safety management). Some students will be reluctant to consult the library at first, but after repeated encouragement, you'll notice them consulting the library of their own volition.
I compiled visual how-to guides on the whip-stitch, back-stitch, running-stitch, and blanket-stitch. You can view these compilations on my slideshare account. I encourage you to download them, and print them out in tile format. Then, voila! You have your own stitch library!!
Need these materials?
Visit Blick!

Share!
Comment!