This is a step-by-step approach to making, dressing and weaving on a cardboard loom. This is a weaving project for a weaving center.
32 Keeps,
7 Likes,
0 Comments
THE PLAN
4 sessions; 40 minutes per session
1. SWBAT define color and color families
2. SWBAT define texture
3. SWBAT create a cardboard loom
4. SWBAT dress and weave with yarn
5. SWBAT remove weaving from loom
The steps are in the 2 page Handout for the Weaving Center.
The teacher will demonstate all the steps. The students will gather all the tools and materials for their center project.
1. Mark off every 1/2 inch on cardboard, top and bottom, even up
2. Cut notches with scissors
3. Thread the cotton yarn on the loom, by starting at the bottom and have a 6" lead on the yarn.
Dress from bottom to top, etc until you reach the end.
4. Leave a 6" lead on the cotton. You will tape both ends to the cardboard.
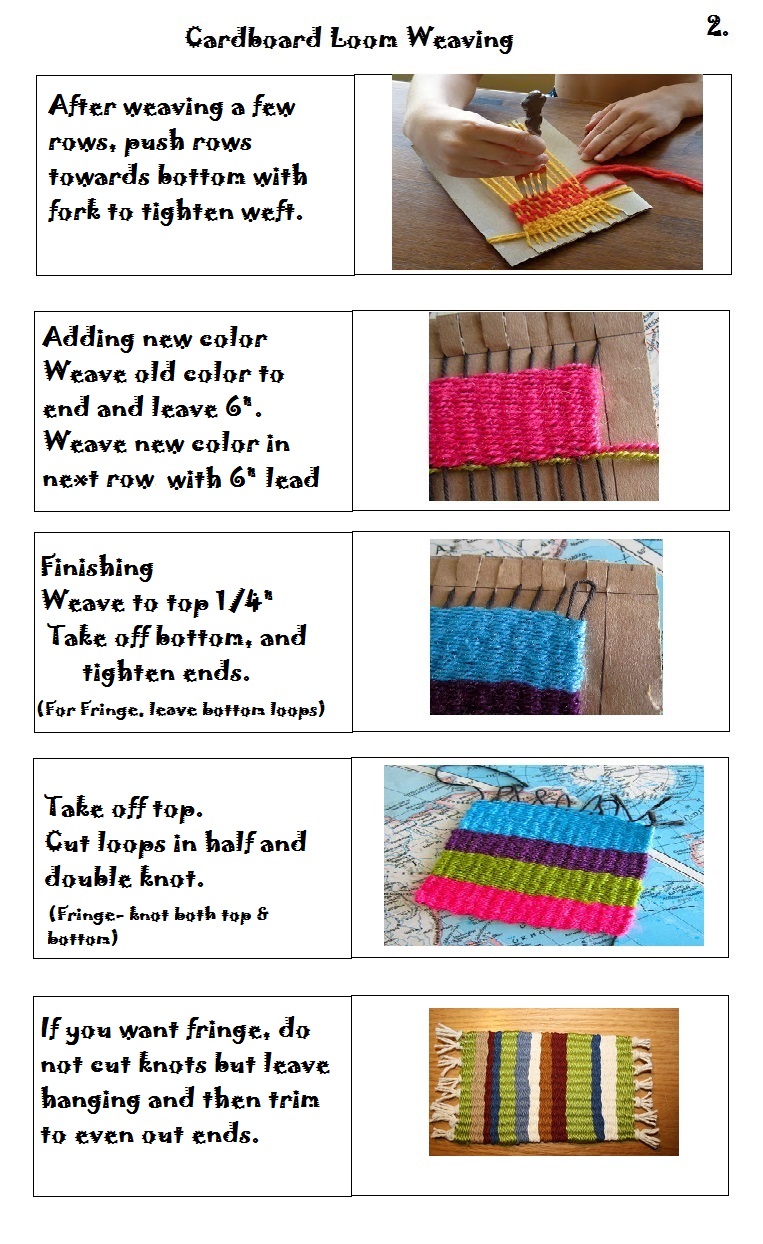
5. Weft. Begin weaving over and under with your yarn (on a bobbin). Straighten the yarn to make a diagonal. Then gently push down with a fork to make the first row.
6. Weave back on the opposite threads, under and over until you reach the end. Make the diagonal and then beat down with a fork.
7. Continue weaving until 1/4" from top.
8. Pull warp loops off bottom first, and tighten up.
9. Insert a stick for the top into the loops to use for hanging. Or, tighten the top loops, double knot and cut off.
10. Display
Students can display weaving in art.
THE FEATURES
Arts and Crafts Movement
Texture, Color/Value
Fibers
Math
You must be logged in to keep, like, or comment on this resource.


Share!
Comment!