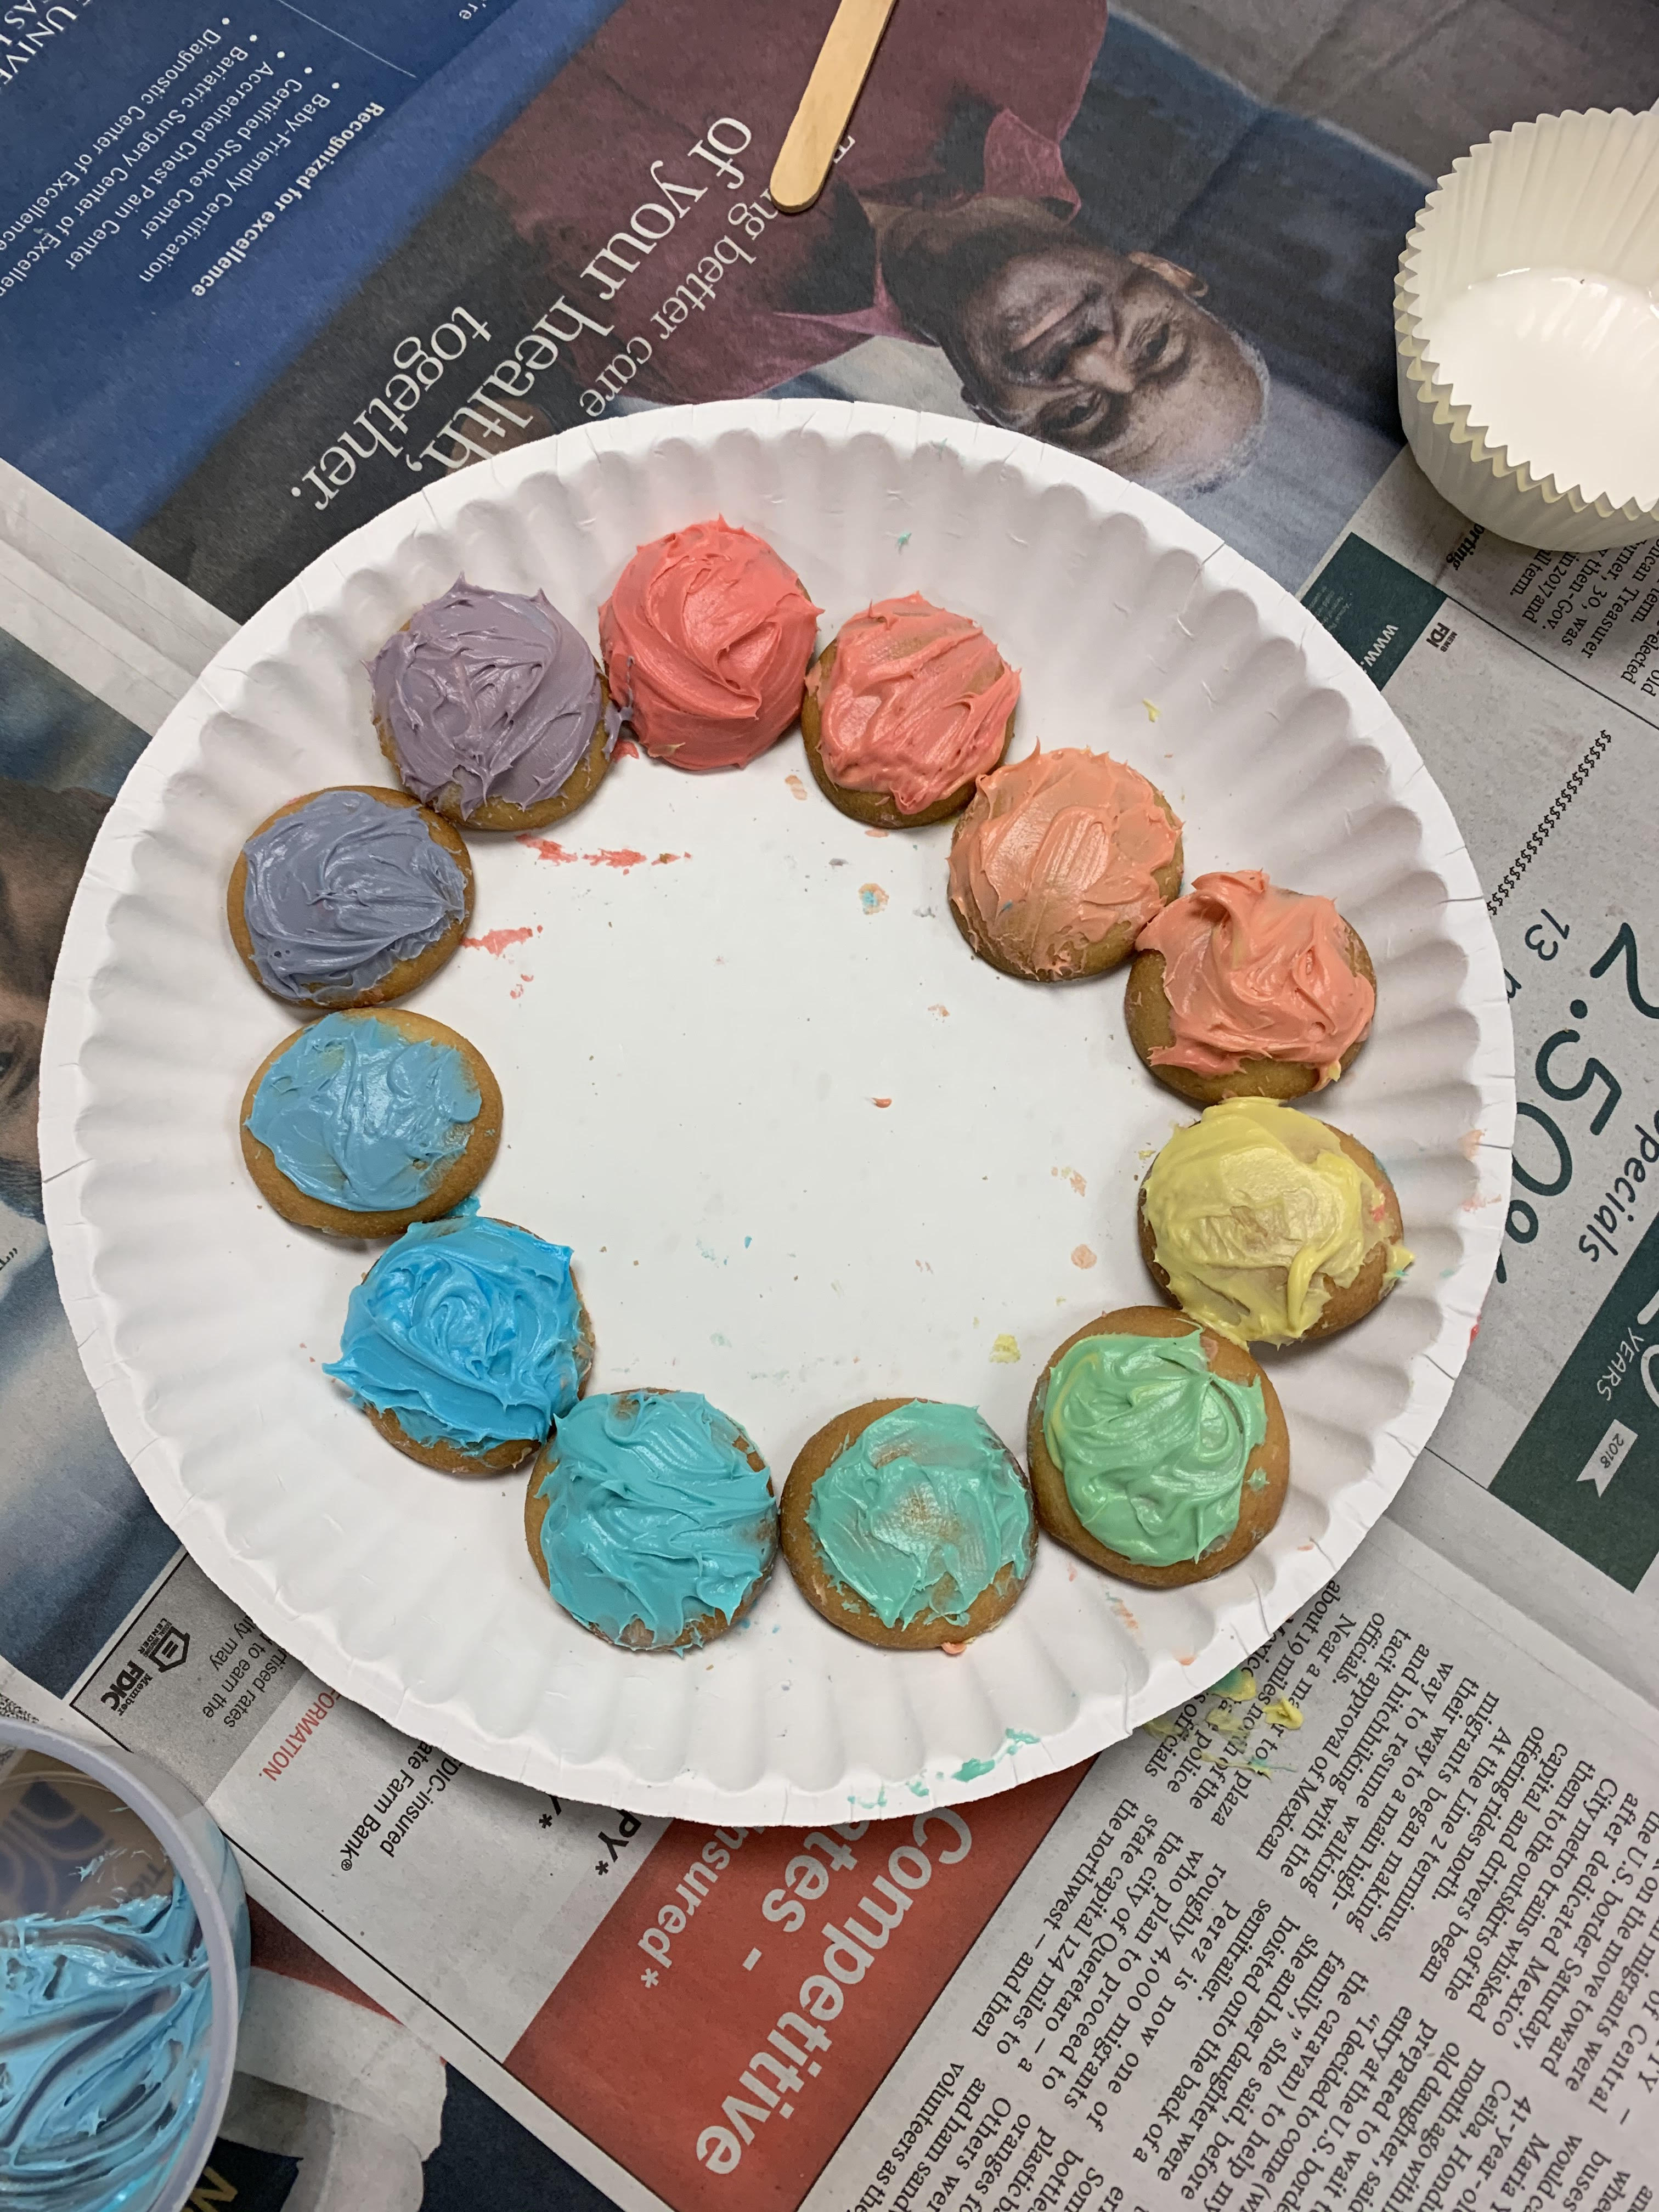
Are you looking for a fun way to test your students knowledge of the color wheel, or reward student on demonstrating their knowledge of the color wheel. All you students to work in group to make an edible color wheel out of vanilla wafers, frosting, and food coloring. This is a fun, colorful, and delicious way to engage students in all things color wheel related.
2 Keeps,
0 Likes,
0 Comments
THE PLAN
1 session; 20 minutes per session
1. SWBAT: Name their Primary Colors
2. SWBAT: Name their Secondary Colors
3. SWBAT: Name their Intermediate Colors
4. SWBAT: Place all of the colors in the order of the color wheel.
1. Paper Plates (a printed color wheel worksheet could be substituted for students who need help with placement.
2. Popsicle Sticks ( at least 1 stick per person).
3. Vanilla Wafers (2 boxes covered 12 color wheels with a few wafers left over.
4. Vanilla Frosting 3-5containers (1 for each primary color). The 3 containers got me through about 9 color wheels, so I ended up using a little more from another container.
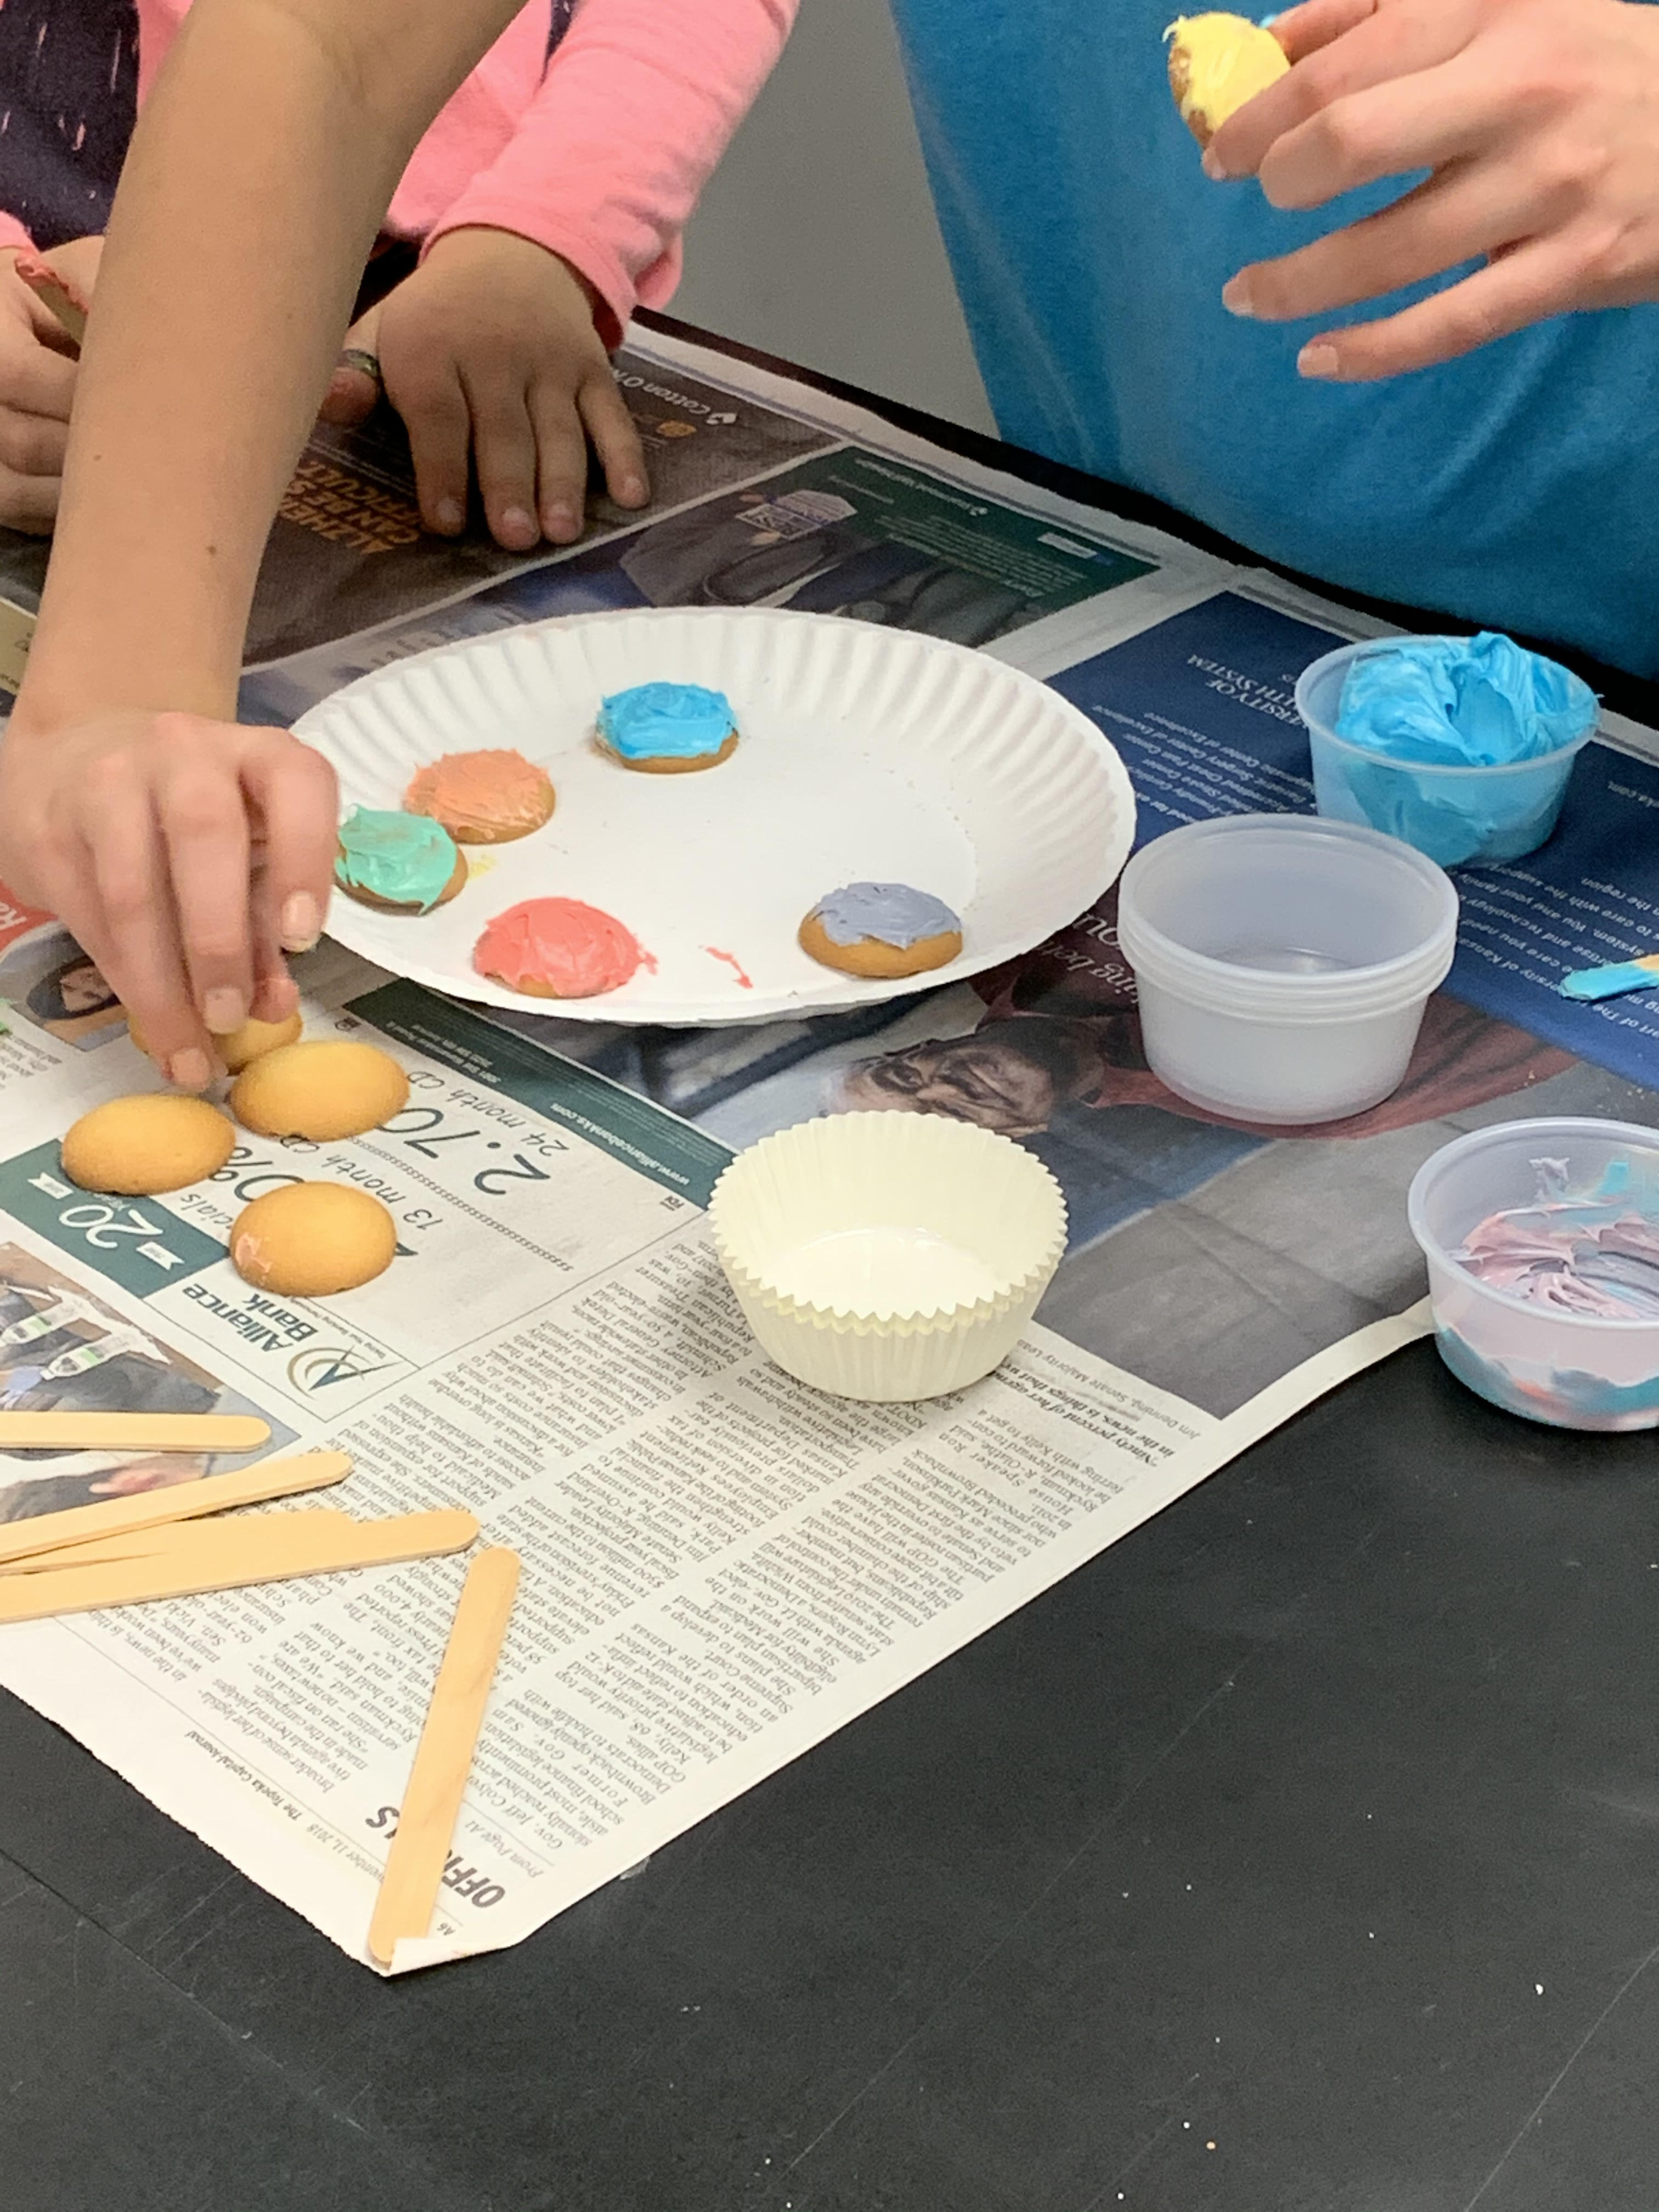
5. Condiment cups or dixie cups for mixing frosting (9 cups per group).
Teacher Prep:
1. Mix food coloring and frosting to create 1 container of blue, 1 container of red, and one container of yellow.
2. Place about 1 (1/2 dollar) blob of each primary color frosting into a dixie cup.
3. Give each group popsicle sticks, mixing cups, 12 vanilla wafers, and a paper plate or color wheel printout.
Explain to your students that they will need to frost one wafer with each of the primary colors. Also make the students aware that when they mix their secondary colors they will need to mix up enough colored frosting to cover 3 wafers - For example if they are mixing green they will need enough frosting to cover a green wafer, a yellow-green wafer, and a blue green wafer.
Once supplies are passed out, students may begin.
1. Using the provided primary color frosting each group will frost 1 wafer with blue frosting, red frosting, and yellow frosting.
2 Groups will then us some of each color of frosting and dixie cups to mix their secondary colors.
3. Groups will now frost one wafer with their green, purple, and orange.
4. Now, groups will mix up all 6 of their intermediate colors in 6 different dixie cups, and frost 1 wafer with each of the colors.
5. Finally, each group of students will work together to place each color into a circle creating an accurate color wheel.
6. When they believe they are finished they will have the teacher check their work.
7. If any color is missing or out of place, teacher will request that the group fix their error. When each group completes and accurate color wheel, they may eat their colorful creations.
Teacher will visually check to see if each color is in the correct order.
I did this with my 5 grade groups in about 15 minutes. I stress how important it was that they work as a group to complete the task. They really enjoy this project.
Attached are 2 worksheets -
1. A blank color wheel worksheet to place their wafers on to keep things in order.
2. A color wheel worksheet with initials to help students with modifications.
THE STANDARDS
Visual Arts Standard 1: Understanding and applying media, techniques, and processes
[K-4] Students know the differences between materials, techniques, and processes
Visual Arts Standard 2: Using knowledge of structures and functions
[5-8] Students employ organizational structures and analyze what makes them effective or not effective in the communication of ideas


Share!
Comment!