Students learn about important watercolour techniques in a way that allows all learners to be successful!
Techniques covered include, masking, graded and flat washes, dry brushing, wet on wet and salt!
13 Keeps,
4 Likes,
0 Comments
THE PLAN
6 sessions; 60 minutes per session
1. SWBAT analyse and use a variety of image development techniques (e.g. distortion, metamorphosis, fragmentation)
2. SWBAT demonstrate increasing complexity in art skills and techniques
3. SWBAT practise safety associated with proper care of art materials and tools
1. Watercolour paints
2. Watercolour brushes
3. Masking Tape
4. Masking Fluid
5. Crayons or candles
6. Salt
7. Watercolour paper (3 sheets each)
8. Water buckets
9. Paper towel
10. X-acto knives
11. Cutting mats
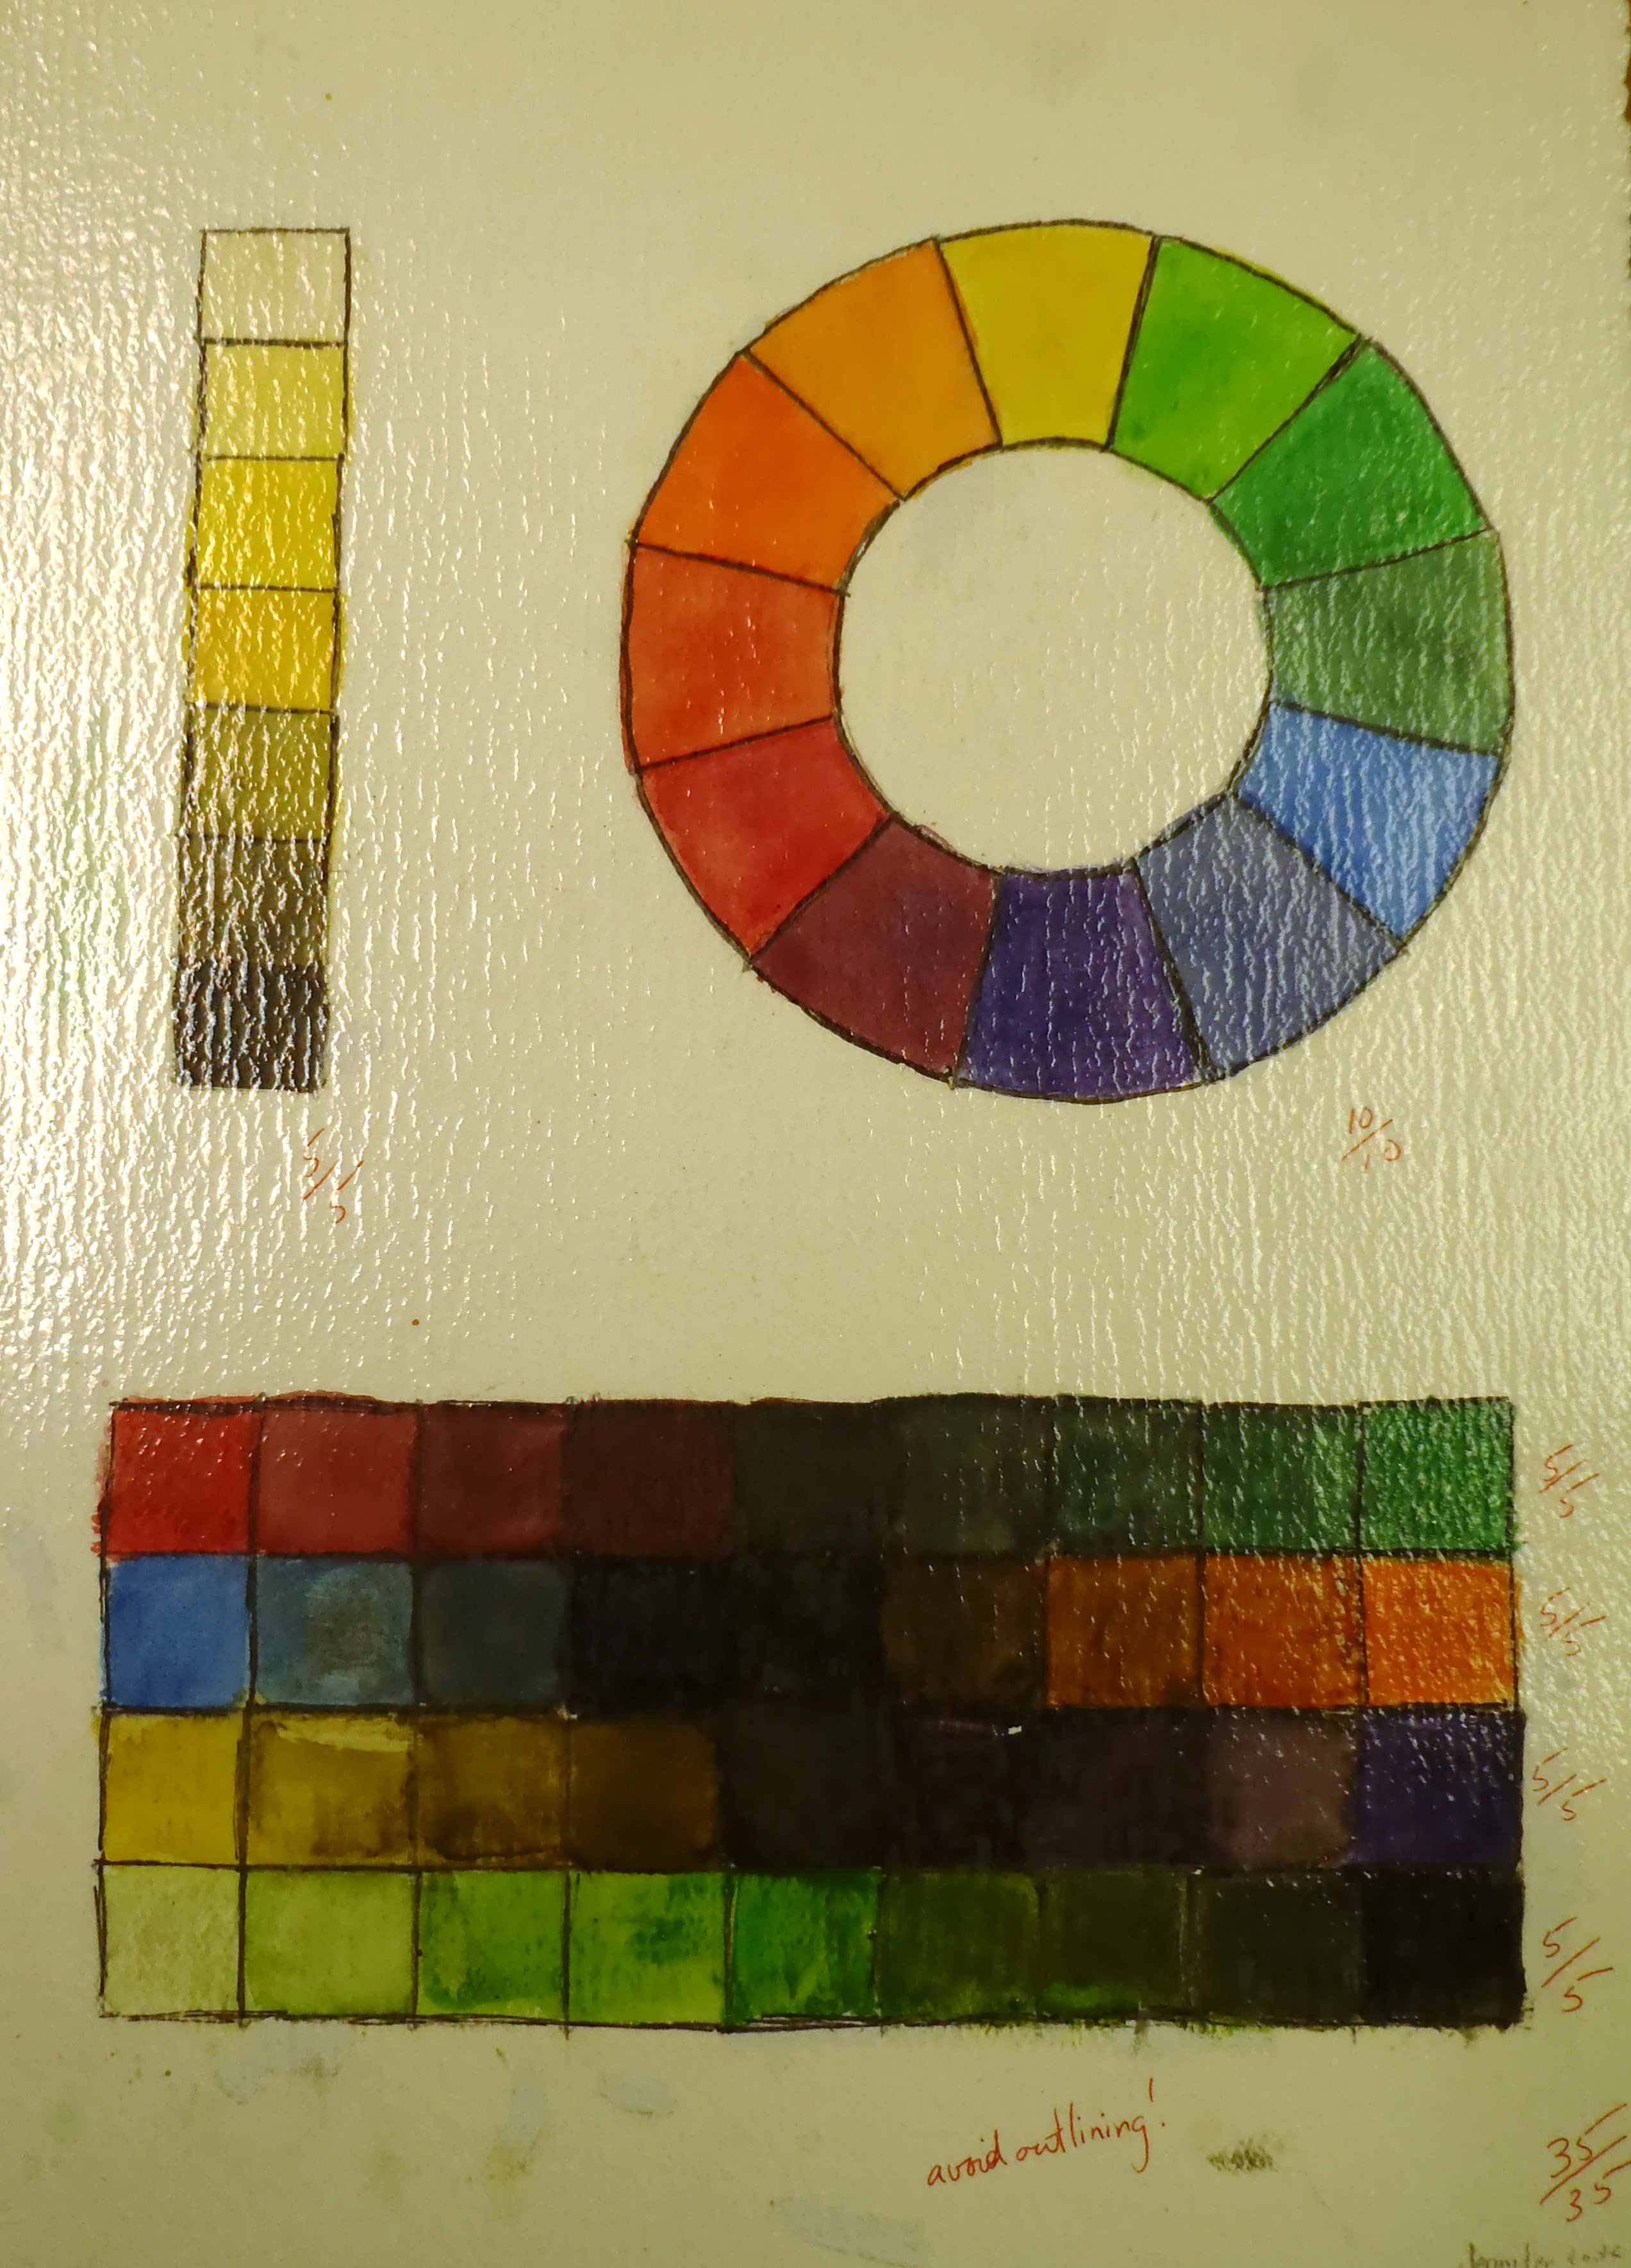
Depending on the students' exposure to watercolours thus far you may wish to start with a simple colour wheel and gradation exercises (4th picture)
1. Introduce the medium and hand out supplies
2. Follow the Powerpoint as you explain and demonstrate the techniques.
- Students tend to struggle with the washes so I try to get them out of the way first and save the fun ones for last.
-If you have access to masking fluid, have it going around the room. Have students take turns drawing a design so that it is dry by the time you get to the masking section.
-I always designate a special masking brush for the whole year, because it inevitably gets ruined.
3. Check students' progress after you complete each demonstration to assess their understanding.
4. When students have completed all the techniques successfully have them flip their paper over so they can use it for the project.
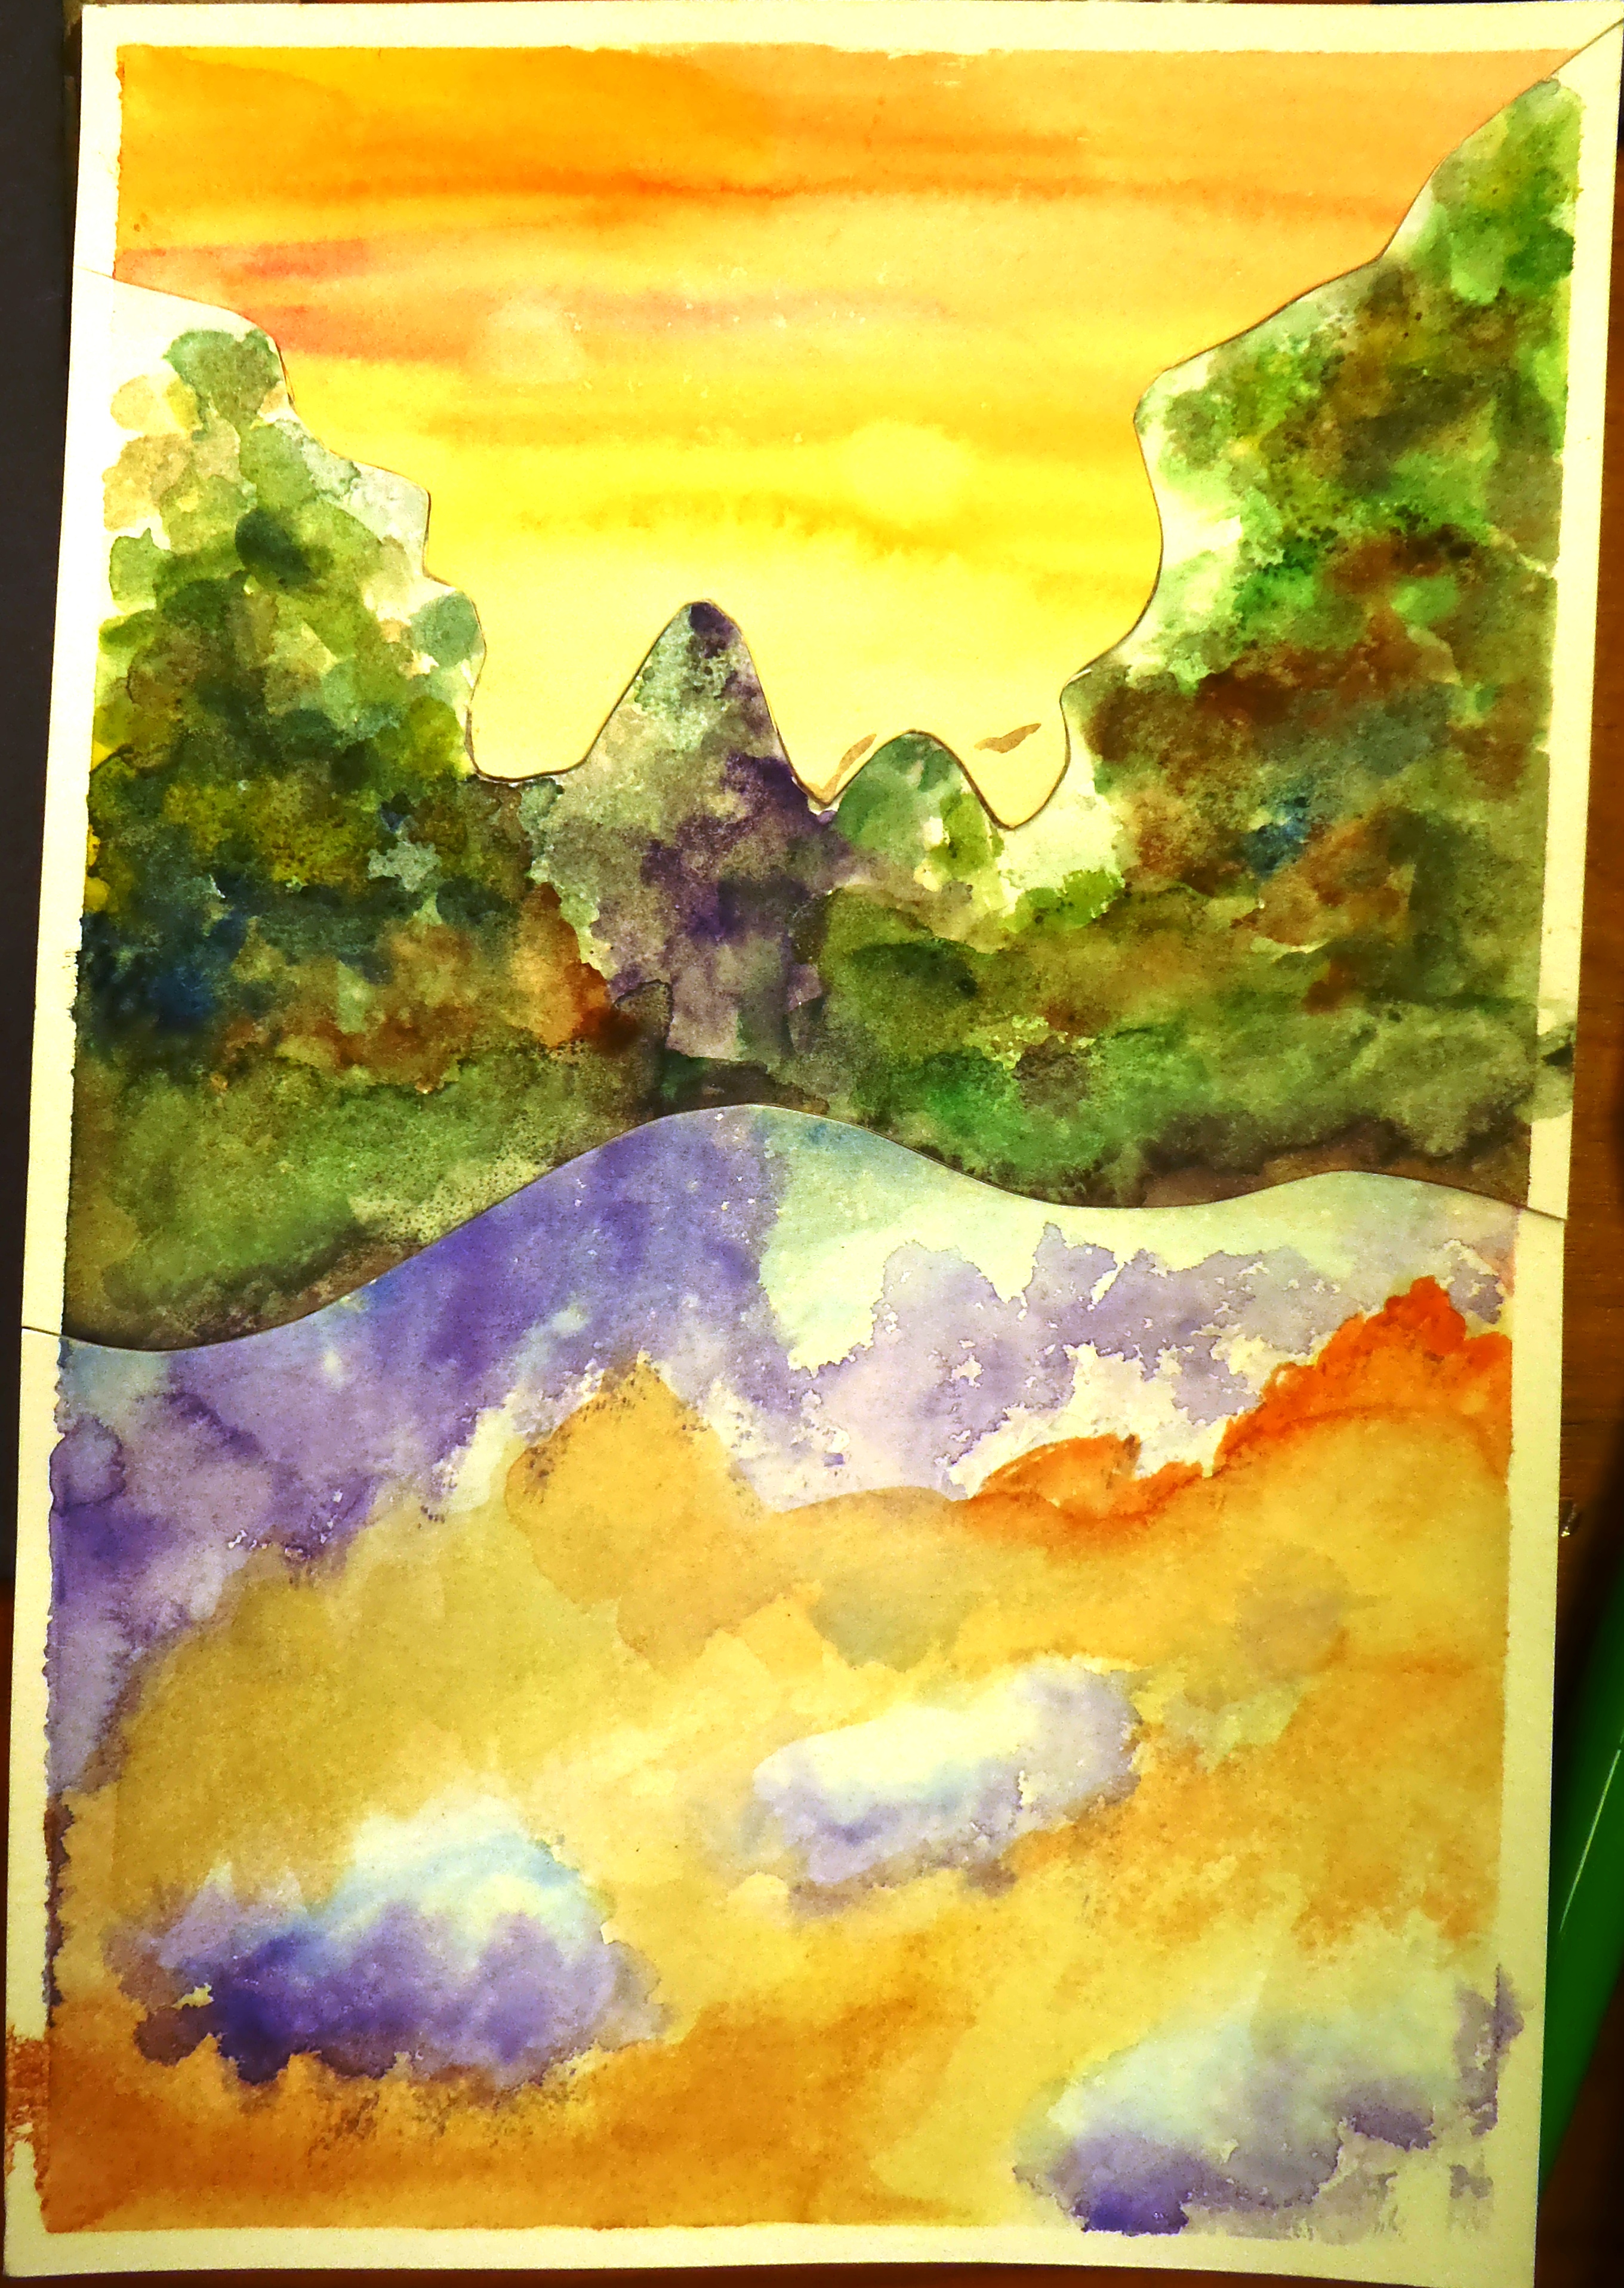
5. Instruct students to paint three (one on each sheet) scenes from nature using as many of the techniques they just learned.
-Students may want to use reference images, that's fine. Just make sure they know their images will be cut apart later so they do not get too attached to their work!
5.When the students complete their three scenes demonstrate how to flush join.
- To flush join, align all three sheets in a stack. Clip sheets in place with paper clips or an alligator clip.
-You may want to put your favourite painting on the top so you can preserve your favourite parts.
- Carefully cut all three sheets at the same time. This creates pieces that can be swapped to fit into any of the paintings. I recommend limiting the amount of "puzzle" pieces to three sizable sections. Small pieces are much to hard to assemble.
-Rearrange your pieces to make a completely new and slightly abstract watercolour landscape.
-Tape the back of your paintings to preserve your arrangement. (Seen in photos 1 and 2 Student may end up wtih up to three new paintings that they like.
6. Chose the best new painting and add embellishments to create your finished piece (photo 3).
-Embellishments can include text, sewing, stickers, more painting, collage, beading....etc
7. Finished work looks very nice matted or mounted on coloured paper.
1. Use of Techniques - has the student incorporated 3/6 techniques in their work?
2. Flush joining - has the student cut and chosen interesting parts of their paintings, have they reassembled their pieces properly?
3. Embellishments - Has the student taken their work further by adding embellishments?


Share!
Comment!