SWBAT to show dimension and form using value rather than line.
SWBAT to accurately draw the parts of a human face.
SWBAT to effectively portray value using stippling.
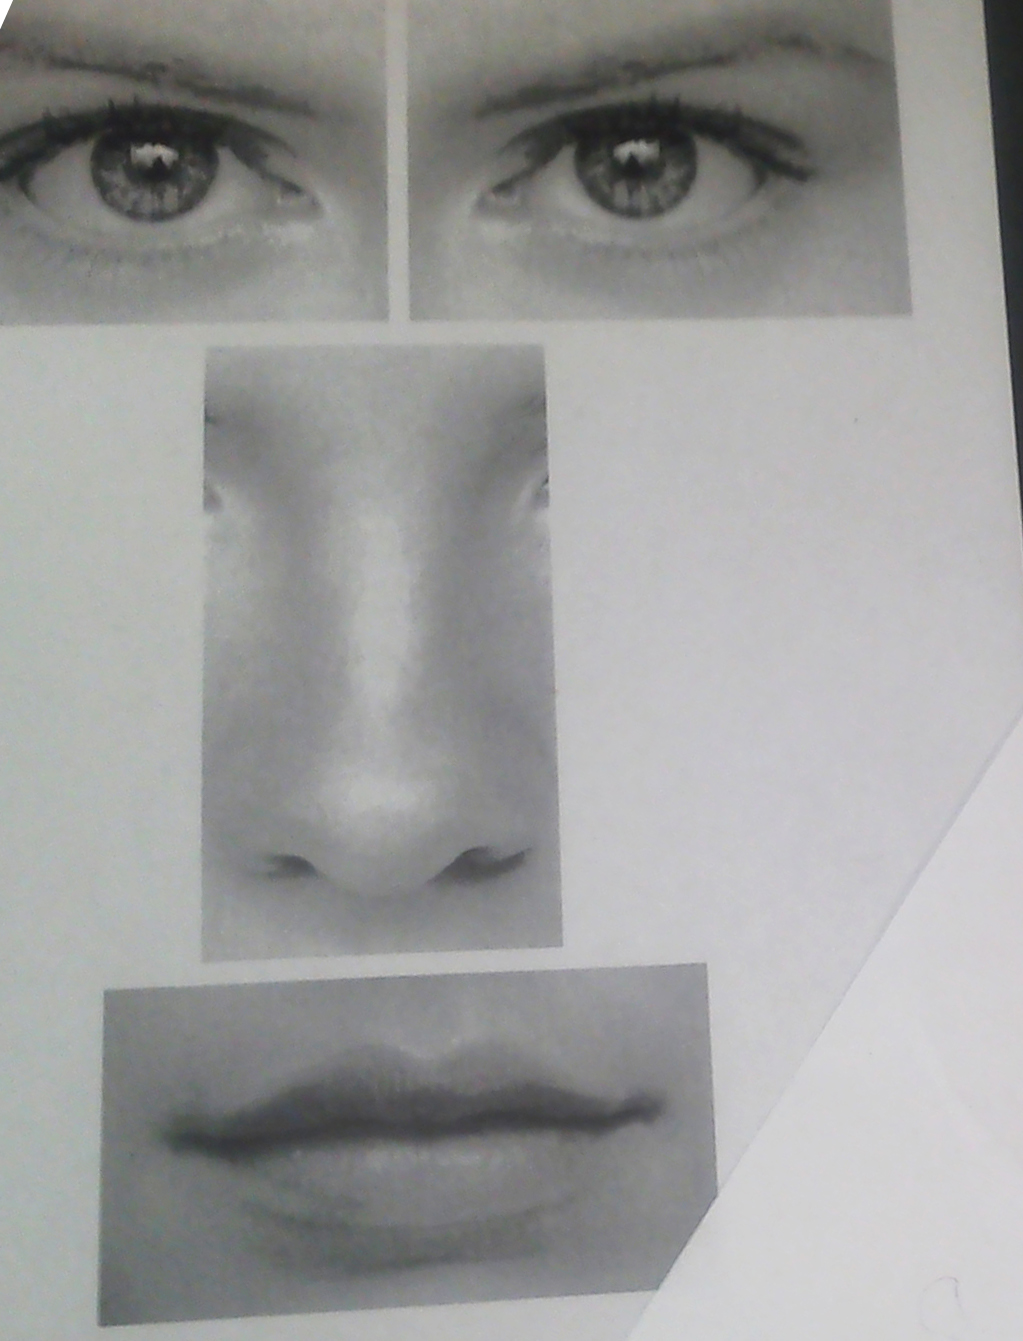
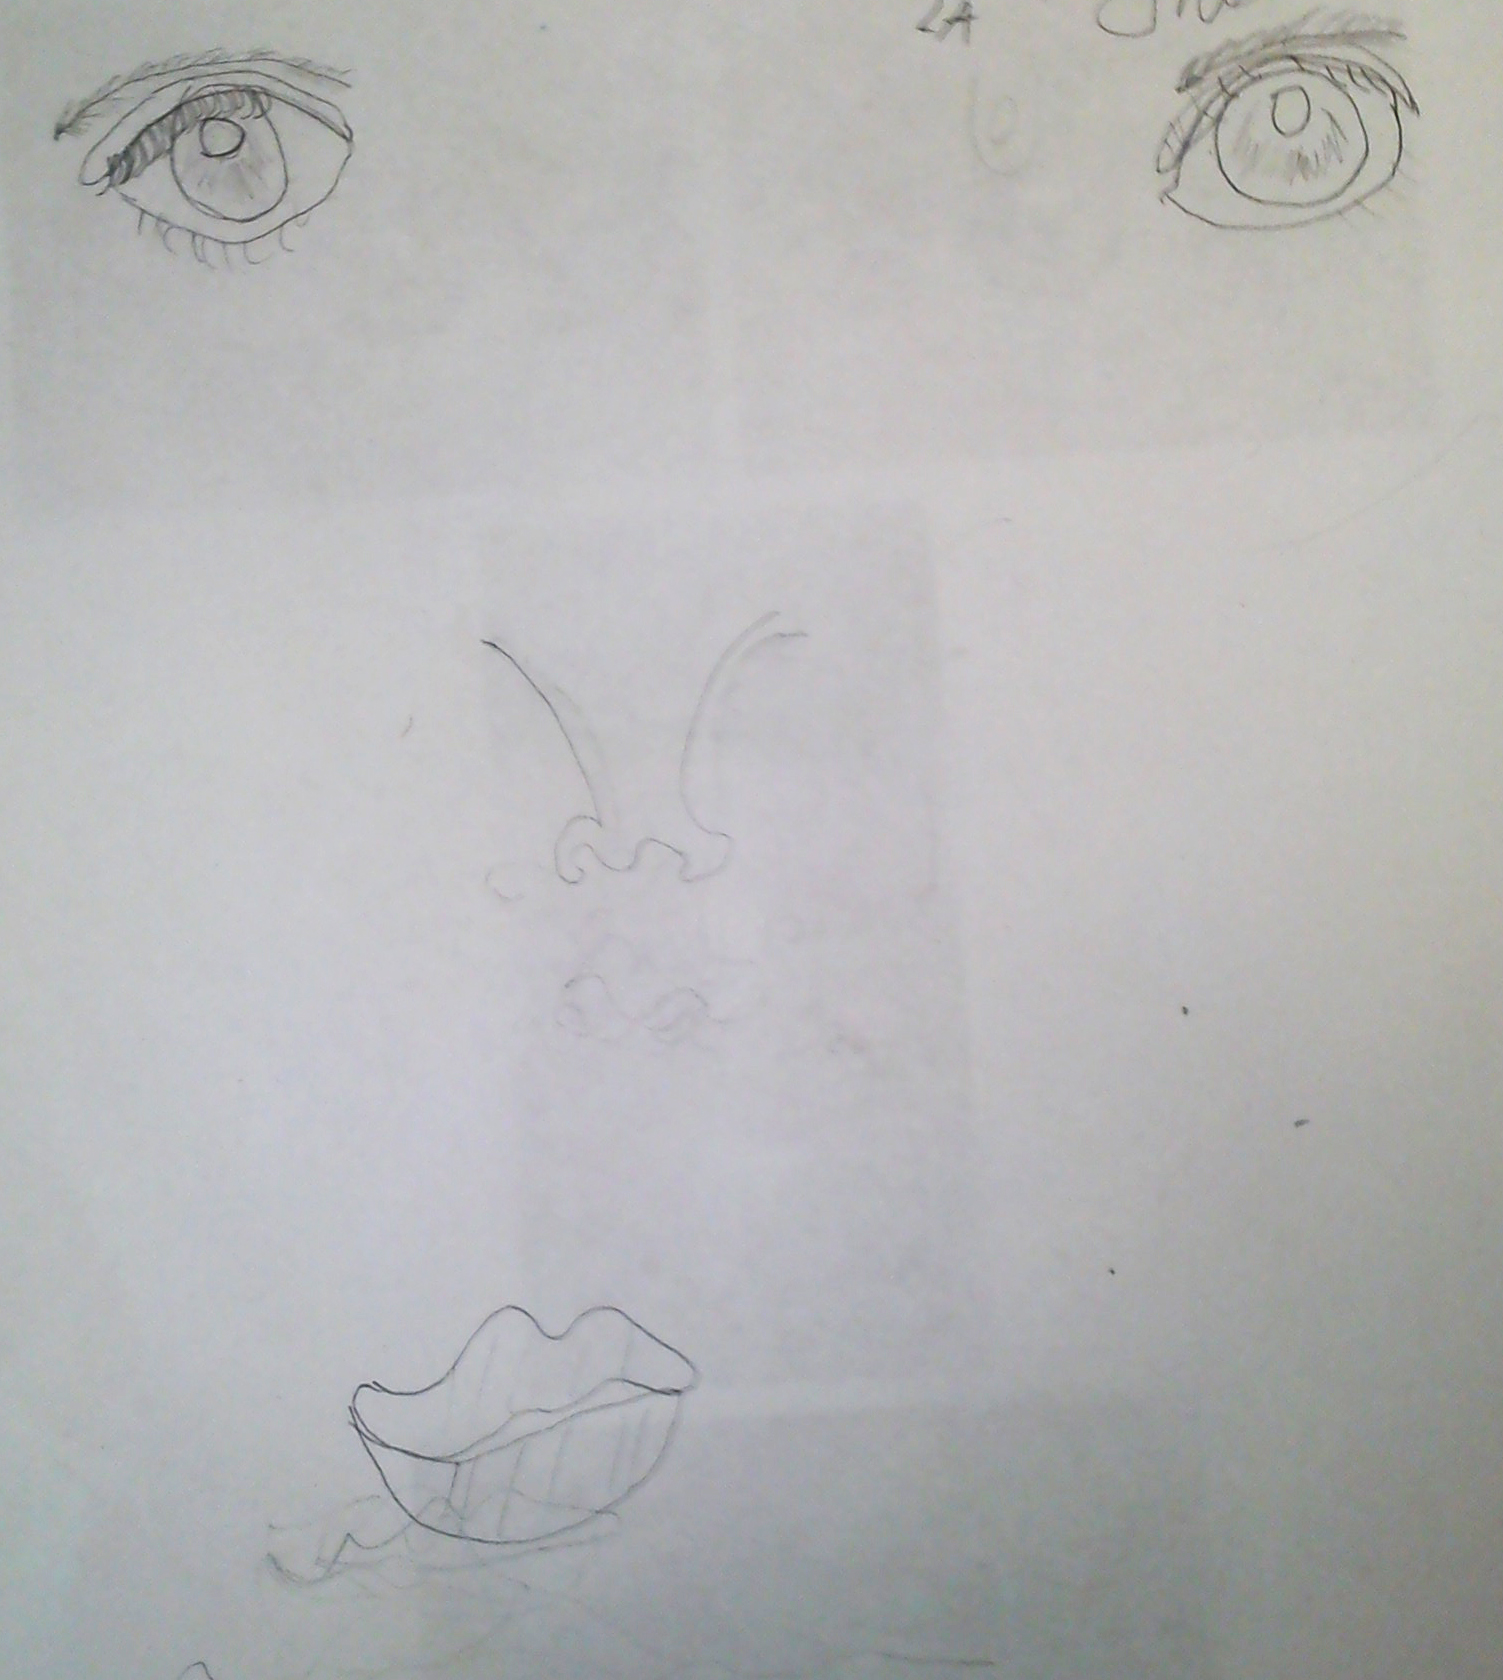
1. Pre-test: Student receive a sheet of paper that contains a photograph of two eyes, a nose, and a mouth. I break the photograph(s) apart to help them understand we will be breaking the face down into parts. This pre-test is used later when the final project is complete - it creates a great comparison.
2. Discussion: Talk with the students about line and value - and how the human face has, arguable, no actually lines. Discuss how stressful drawing can be when you don't know these basics or steps to start with.
For steps 3-5: Left brain instructions can be found a variety of ways, every where. Depending on the level will determine how far involved you want the steps to get - I search Pinterest and Youtube to constantly update and make my own refined set of instructions for each step.
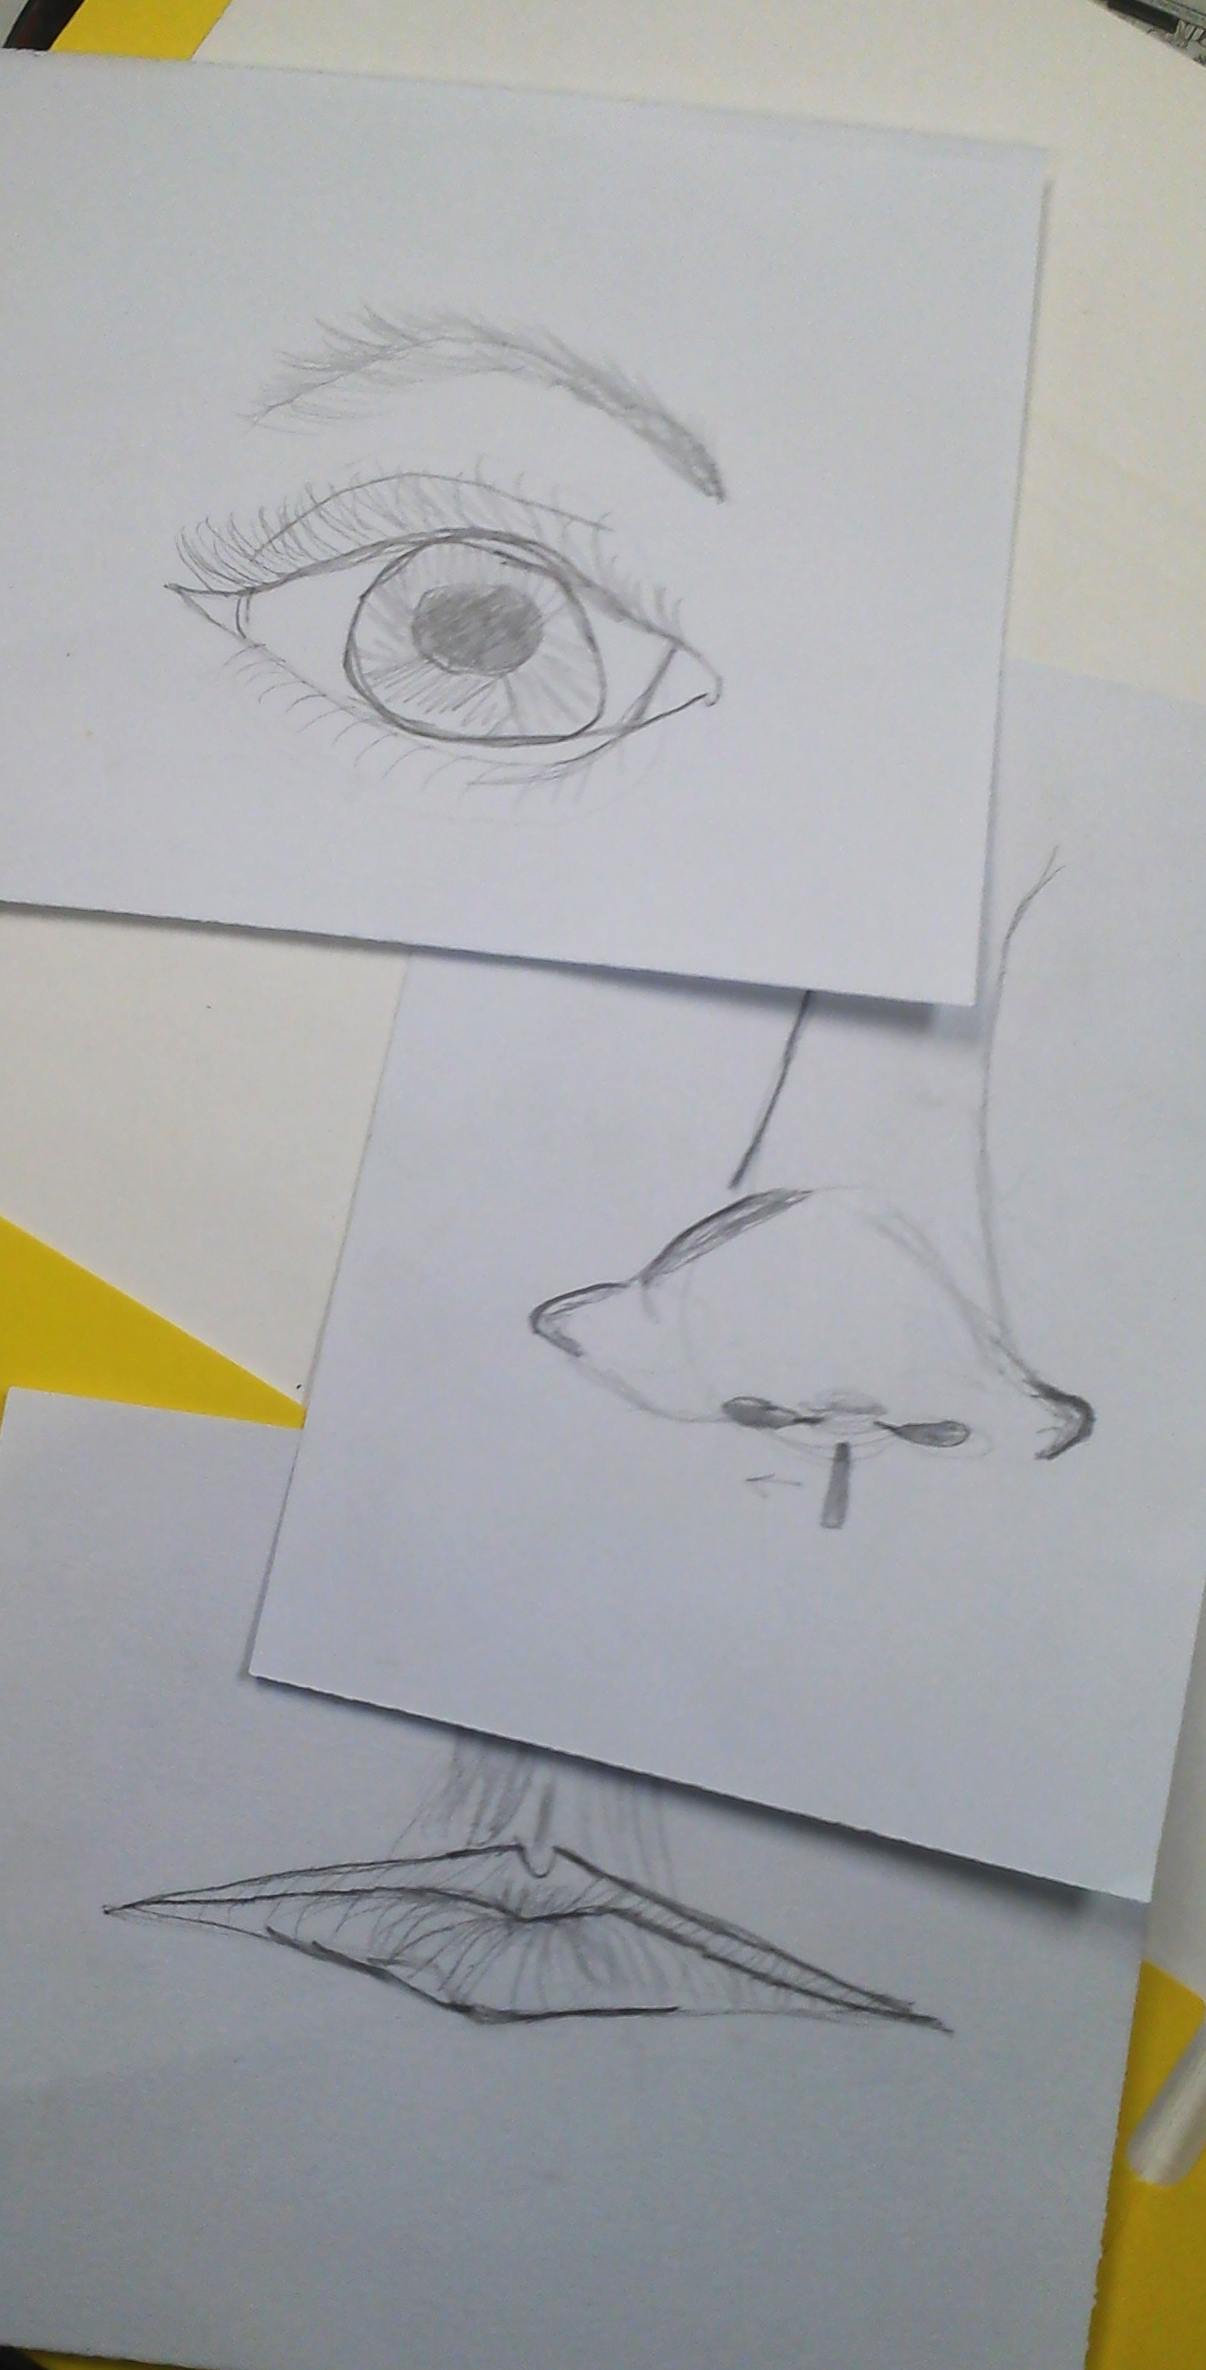
3. Part 1: Eyes: Students receive "left" brain set of instructions simplifying the steps that can be used to draw a proper eye. These instructions should be simple enough that they could be discussed as "one way" not the "only way". It is important for students to realize that "how-to" drawings are intended to help, and they are not a "know all". Have students try using the steps on their own - then walk through them together as a class. After walking through them together, have students use the remaining time to practice.
Example of steps:
http://www.drawinghowtodraw.com/stepbystepdrawinglessons/2010/11/how-to-draw-realistic-eyes-with-easy-step-by-step-drawing-lessons/
4. Part 2: Nose: Students receive another "left" brain set of instructions simplifying the steps that can be used to draw a proper nose. Same as before, keep them simple and discuss "other ways" to draw. The nose is the most important part for emphasizing value rather than line - this is probably the most challenging form for students. Again, have students try the steps on their own - then walk through them together as a class. After walking through them together, have students use the remaining time practice.
Example of steps:
http://www.howtodrawpeoplestepbystep.net/wp-content/uploads/2012/05/how-to-draw-people-faces-step-by-step1.jpg
5. Part 3: Lips: Students again receive "left" brain set of instructions simplifying the steps that can be used to draw a proper set of lips. Same as before, keep it simple. Emphasis that it's all about value, again and again and AGAIN. Have students try the steps on their own - then walk through them together as a class. After walking through them together, have students use the remaining time to practice.
Example of steps:
http://media-cache-lt0.pinterest.com/originals/4b/7a/f8/4b7af82fcadee4df660f6344d3c77181.jpg
6. Allowing about a class period for each part of the face, have students use a fourth of a drawing paper to draw one eye, one nose, and one mouth. They will do a fourth one of their choice too. Rather than use one sheet of paper, I cut them into fourths because it helps students keep the image large - have them try and fill the entire piece with one eye, etc. By the end of this time, students will have a folder with their pre-test, 3 different instructions, practice drawings, and 4 final-ready drawings.
7. Once students have 4 completed pieces of paper, use a fifth fourth page to practice doing a value scale using stippling (dotting). Remind them to avoid whispy lines and that they cannot color in black no matter what - you can easily tell. Once they master that, have them begin applying stipple to their drawings. i usually have them find the darkest part of each drawing (eyes-pupil, nose-nostrils, mouth, closing) so that they can start off confident and build from their. Adding this value component really helps students understand that value is more effective than line. This involves patience - have student erase pencil to see where they need to add more detail - have them hold their papers up far away to see how effective they are being.
8. Once all drawings are stippled, have students assemble and glue the pieces into a completed collage. See the "assessment section for more information on how to use the pre-test in this lesson.
I use a consistent form of assessment aligned with standards and rubrics. The rubric attached shows is set up so that students can review it ahead of time, goal set and when a project is completed, students self-assess, peer-assess and write written responses prompted by essential questions.
Use their original pre-rest as a written response prompt - how have they improved, what have they learned, and how does value play a roll in effective drawing?
This really boosts my 8th graders confidence - many start off thinking they can't do it and some of the more unskilled are the best by the end of the unit!


Share!
Comment!