This is a middle school additive sculpture lesson plan. It includes Common Core Standards,and Science and Technology integration. The lesson could easily be adapted to High School, just change idiom motivation to metaphor or narrative. Included here are visual aids, jpeg examples, display explanation sheet and clean-up procedures for working with clay. Enjoy!
18 Keeps,
2 Likes,
1 Comments
THE PLAN
10+ sessions; 55 minutes per session
1. SWBAT understand that there are many reasons for creating art, one of which is to entertain through use of humor.
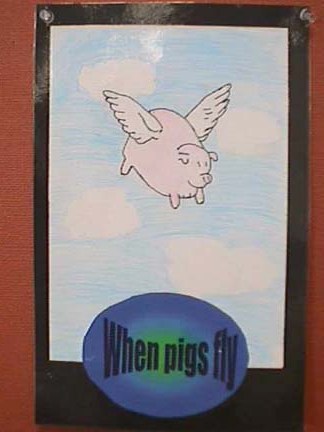
2. SWBAT understand grammatical idioms, and as artists see visual image and humor in their literal interpretations.
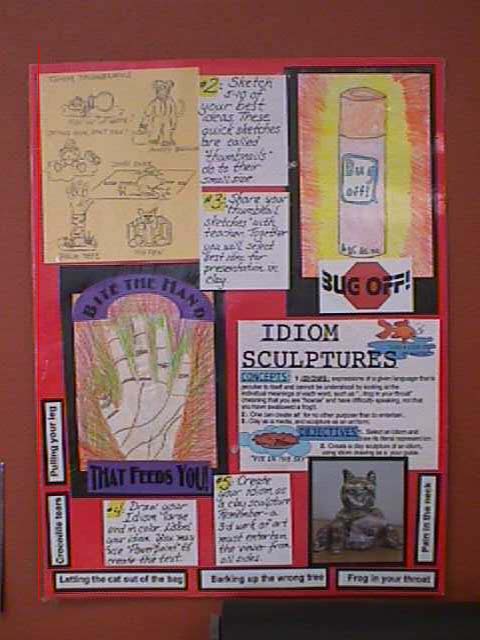
3. SWBAT learn what thumbnail sketches are and how they are used by the artist to jot down quick ideas and problem solve.
4. SWBAT learn how to prepare clay for use, (procedures for storing clay and techniques for creating an additive sculpture.)
5. SWBAT learn about chemical change through firing, turning clay to ceramic product, and difference between under-glazing and glazing sculpture.
6. SWBAT learn about the act of presenting art to an audience.
7. SWBAT create a minimum of 5 idiom sculptural thumbnails for student/teacher review.
8. SWBAT create color layout (2-D) plan of idiom sculpture.
9. SWBAT follow written directions, to create accompanying text for their Idiom Layout in the PowerPoint program using Word Art.Word Art must be altered from the given computer designs and must be placed on background shape. Work and shape must work as contrasting, unified whole.
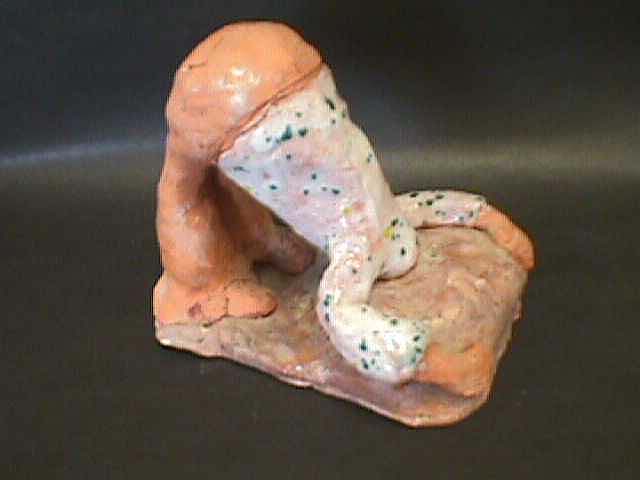
10. SWBAT create a humorous, additive clay sculpture that illustrates the literal meaning of an idiom.
11. SWBAT use underglaze to color greenware, and glaze on fired bisqueware.
Teacher Materials:
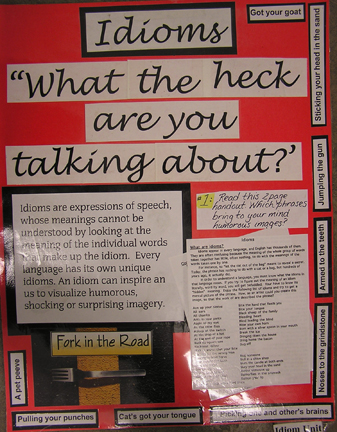
1. Idiom/compound word handout
2. Project posters ((2)
3. Project examples (sculptures), 4. Photographic files,(image references, (if a student is creating "Bull in a China Shop" then you need images of bulls.)
5. Computer lab w/ PowerPoint (or Word Art in Microsoft Word application)
6. PowerPoint directions handout
7. Color Printer
8. Elements and Principles of design poster.
9. Storage area set aside for clay projects,
10. Kiln(s)
11. Paper cutter, stapler
12. Presentation camera or Overhead projector
Student Materials:
1.Sketch paper for thumbnails
2. drawing paper for selected idiom illustration/layout
3. Drawing materials (oil pastels, colored markers, colored pencils,)
4. Construction materials (scissors, rubber cement, glue sticks)
5.Clay boards (3/4" plywood sheets cut into 1'x1' squares. Use sanding block to remove rough edges).
6. Preserving/storing of individual sculpting materials(permanent marker, masking tape, plastic grocery bags, rags,)
7. low-fire clay,
8. clay tools (and metal strainer, rolling pins and wooden sticks, plastic cutlery...)
9. Set-Up and Clean-Up materials (water buckets, newspaper, paper toweling, spray cleaner for tables)
10. Hand soap and hand lotion
11. glazes and under glazes, and paintbrushes
Day 1.
Bring attention to display, project poster, art elements and principles of design.
Hook: “Why do people create art?” (many answers-bring to mind HUMOR,)
and what artists might use HUMOR in their art/jobs
--Commercial artists, Advertising…
Motivate: Start talking in idioms; ask if they know people who talk like this (usually grandparents).
Introduce: grammatical concepts of idioms, puns and compound words.
Discuss: as artists we don’t need to know what these phrases mean to get a visual image. What do they visualize when I say “….” (Read aloud some idioms.)
Introduce: pre-sculpting steps listed and illustrated on project poster:
1. Read handout,
2. Thumbnails,
3. Teacher review,
4. Layout. PowerPoint
Students: Attentive and active listening, contributing opinions,
Review idiom poster and handouts.
Day 2:
Hook: Enduring Understandings, post and read aloud, discuss “How do these pertain to what I showed you yesterday?” “What is an Enduring Understanding?”
Discuss and Demonstrate: (on overhead)Technique for drawing quick, clear Thumbnails (Using basic shapes to define sculptural form.)
Students: Attentive and active listening,
Gather supplies, pencils, sketch paper, idiom handouts
Create minimum of 5 thumbnail sketches illustrating entertaining sculptural plans.
Share thumbnails with teacher. Discuss feasibility of each idea.
Day 3:
Hook: “Can you think of a great billboard, magazine ad, or commercial that really got your attention and surprised, and/or shocked you and made you laugh?”
Demonstrate creation of Layout
Use of photographic resources to move beyond “elementary clip-art”
Composition, vertical / horizontal
Remind students of posted project poster with illustrated steps and student examples.
Guided Practice, individual help
Students: Gather supplies, layout handout, sketch paper, thumbnails, drawing paper, media (student’s choice), photographic resources
Create larger layout/illustration. Determine composition, with selected media, (draw large, dramatic for impact)
Receive advice/critique.
Adjust, and modify drawing as needed.
Day 4:
Review and list student objectives for day. Individually evaluate student thumbnails and layout compositions, look for weaknesses and strengths.
Guided Practice, individual help
Remind students: tomorrow we will be meeting in the computer lab, creating text and background shapes to illustrate Idiom layout.
Students:
Strive to complete thumbnails and layouts, demonstrating balance, accurate definition of form, dramatic impact.
Day 5:
*In Hall, review lab behavior, assign seats.
Objective: to create text and unifying background shape for idiom layout.
In lab, display examples.
Distribute handout (PowerPoint instructions)
Students:
Independent practice,
Striving for: Personalized word art
Placement and grouping of words
Selected background shapes
Contrasting and Complementary components.
Day 6:
Computer Lab: Last day
Review objectives
Evaluate work before printing
* Remember to gather art materials for illustration work for those done on computers.
Students:
Complete exercise,
Teacher Approval,
Print
Complete layout with media, text
Submit
Day 7:
Intro. To Clay;
(call students to demo. Table)
Discuss media of Clay,(what, where, qualities…)
Demonstrate:
Table and station set-up
Preparation of clay (slice, slam, wedge, repeat)
Construction, Additive Sculpture (making shapes, attaching for strength, working in the round....)
Lead students through clean-up and storage procedures.
Students:
Attentive and active listening, observing.
Day 8:
First day with Clay
Review:
Set-up
Table captains,
Preparation steps
Construction steps
Distribute: clay and materials
Guided Practice: Preparation and Clean-up and Storage
Circulate and help with construction issues.
Students:
Set-up, table captains
Collect and label materials
Prepare clay for use
Start Additive Sculpture
Properly store clay, and clean-up table.
Day 9:
Continue Additive Sculpture
Review procedures (set-up,preparing clay,sculpting, storage, clean-up)
Guided Practice
Students:
Continue creating Idiom Sculpture, following procedures. taking care to construct with strength and work "in the round".
Day 10+ :
Continue Sculpture-Depending upon class period length, number of students in class, size of projects…add days needed to complete sculpture.
When sculptures are becoming complete, demonstrate how to:
Hollow works using thumb pushed into core of sculpture and how to sign art with pin tool before drying.
Remove sculpture from plastic bag, set on open shelving.
* Air-dry sculptures for minimum of one week.
After Sculptures are at least leather hard:
Introduce use of underglaze.
Sort under-glazes by hues.(Ex. : all blues on Table #1, greens on Table#2 and so forth…).
Students circulate table to table to apply under-glazes.
Students carry sculptures carefully around class on their on 1’x1’ plywood boards.
On each table have paint brushes and water buckets.
Demonstrate application.
Discuss fragility of work as a green-ware piece.
Demonstrate working from large background colors first, then adding small details on top.
Demonstrate clean-up procedures, storage of drying sculptures.
*Complete coloring of piece in one class period. (Students may attend art clinic after school if they need more time)
Teacher notes:
When sculptures are dry and warm to touch, fire.
Clear-coat Glazing:
When sculptures have been fired, demonstrate application of clear glaze.
Have a center in room available for rotating group of students to glaze work and set aside for re-firing.
Evaluation Day:
Class evaluation
Display idiom illustrations (with Word Art)along with companion sculpture.
Lead Class review, critique.
Introduce Reflection piece.
Discuss how to fill out "Review, Reflect and Evaluate"paper.
1. Students will be involved in the final presentation of their dual Idiom works—(the two dimensional, WordArt illustration and their corresponding, 3 idiom sculpture) during a class review and class critique.
2.Students will prepare work for presentation, attaching sculptures with duck tape to cut foam core squares(cheap at Dollar store), and "float" idiom illustration on black construction paper.
3. Students will complete a reflective artist statement and project rubric.
Common Core Standards:
CCSS.ELA-Literacy.L.8.5
Demonstrate understanding of figurative language, word relationships, and nuances in word meanings.
CCSS.ELA-Literacy.L.8.5a
Interpret figures of speech (e.g. verbal irony, puns) in context.
CCSS.ELA-Literacy.L.8.5b Use the relationship between particular words to better understand each of the words.
CCSS.ELA-Literacy.L.8.5c Distinguish among the connotations (associations) of words with similar denotations (definitions) (e.g., bullheaded, willful, firm, persistent, resolute).
Feel free to contact me with comments or questions!
I have attached corresponding posters and student work images. Enjoy!
If this plan is hard to follow in this format, I have a pdf that is much more thorough. I can easily send if anyone inquires. :)
THE STANDARDS
Visual Arts Standard 1: Understanding and applying media, techniques, and processes
[5-8] Students intentionally take advantage of the qualities and characteristics of art media, techniques, and processes to enhance communication of their experiences and ideas
Visual Arts Standard 2: Using knowledge of structures and functions
[5-8] Students employ organizational structures and analyze what makes them effective or not effective in the communication of ideas
Visual Arts Standard 3: Choosing and evaluating a range of subject matter, symbols, and ideas
[5-8] Students integrate visual, spatial, and temporal concepts with content to communicate intended meaning in their artworks
Visual Arts Standard 6: Making connections between visual arts and other disciplines
[5-8] Students describe ways in which the principles and subject matter of other disciplines taught in the school are interrelated with the visual arts
jennteal08/29/2014 at 06:26am
This is great. I do a printmaking lesson where they do themes based on metaphors and similes. I was thinking about adding in idioms in some way this year.
You must be logged in to keep, like, or comment on this resource.


Share!
Comment!