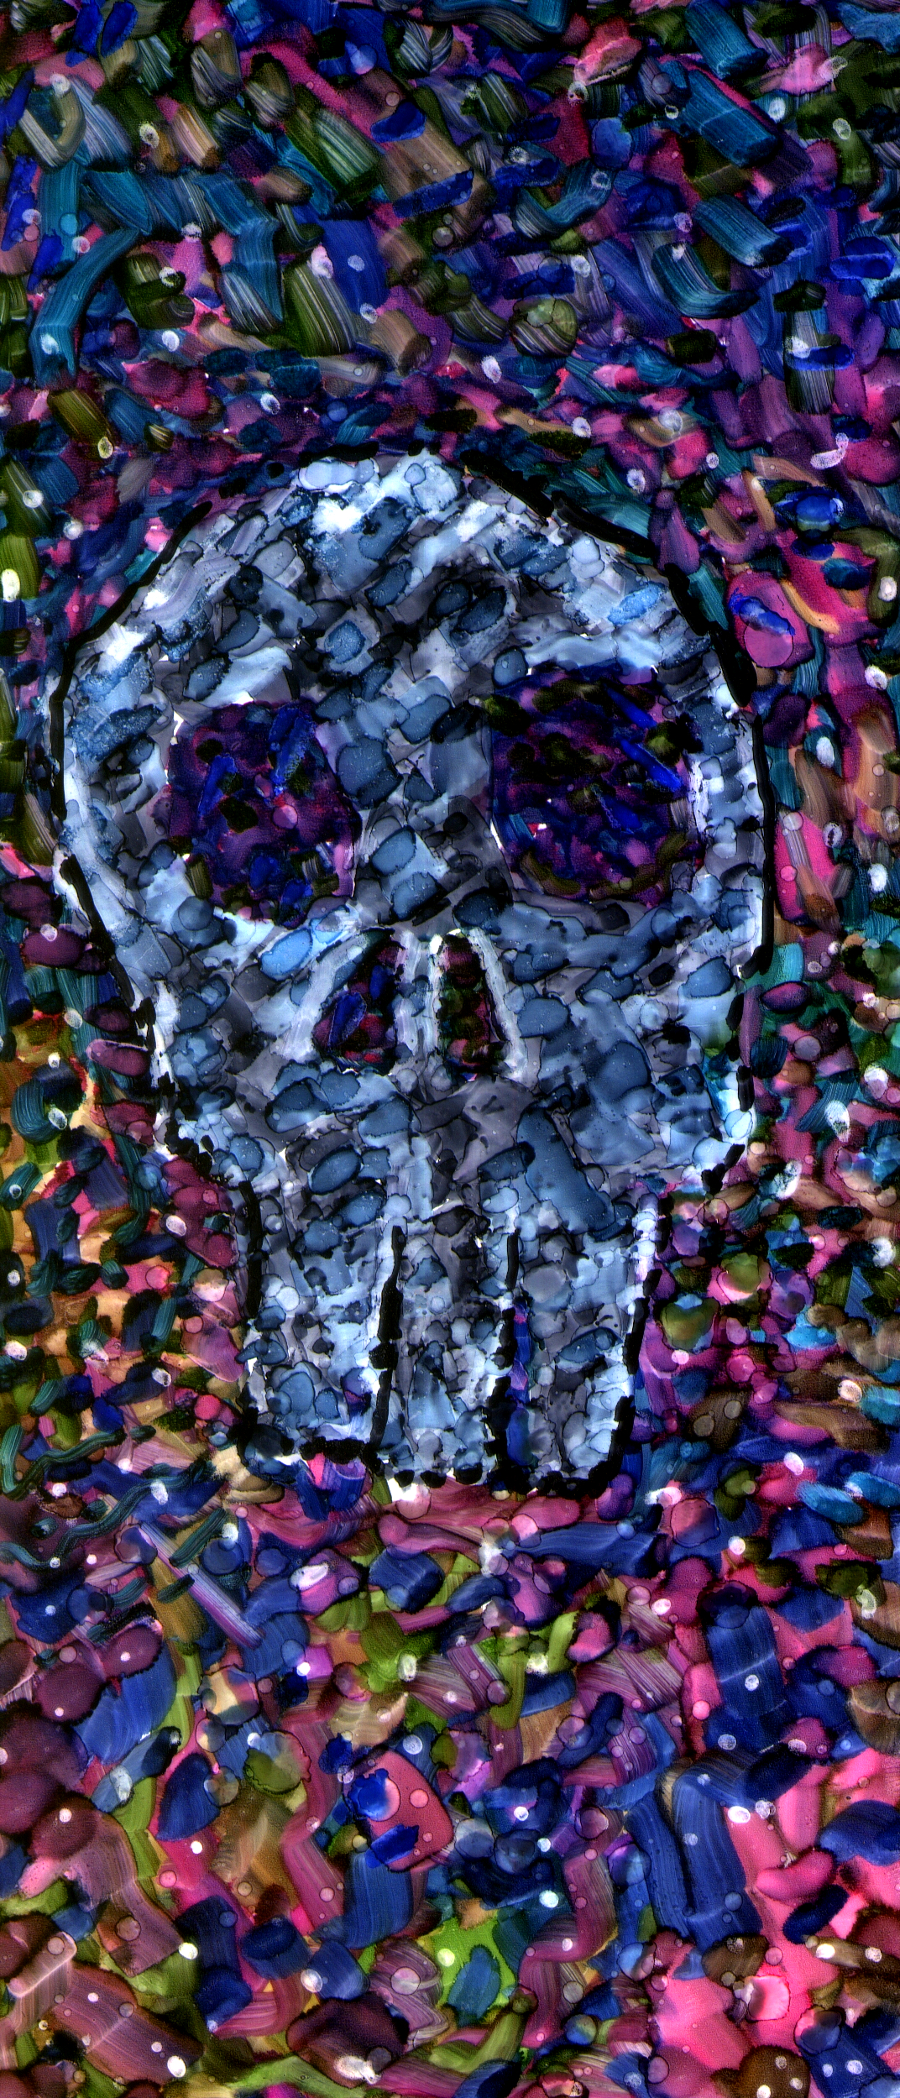
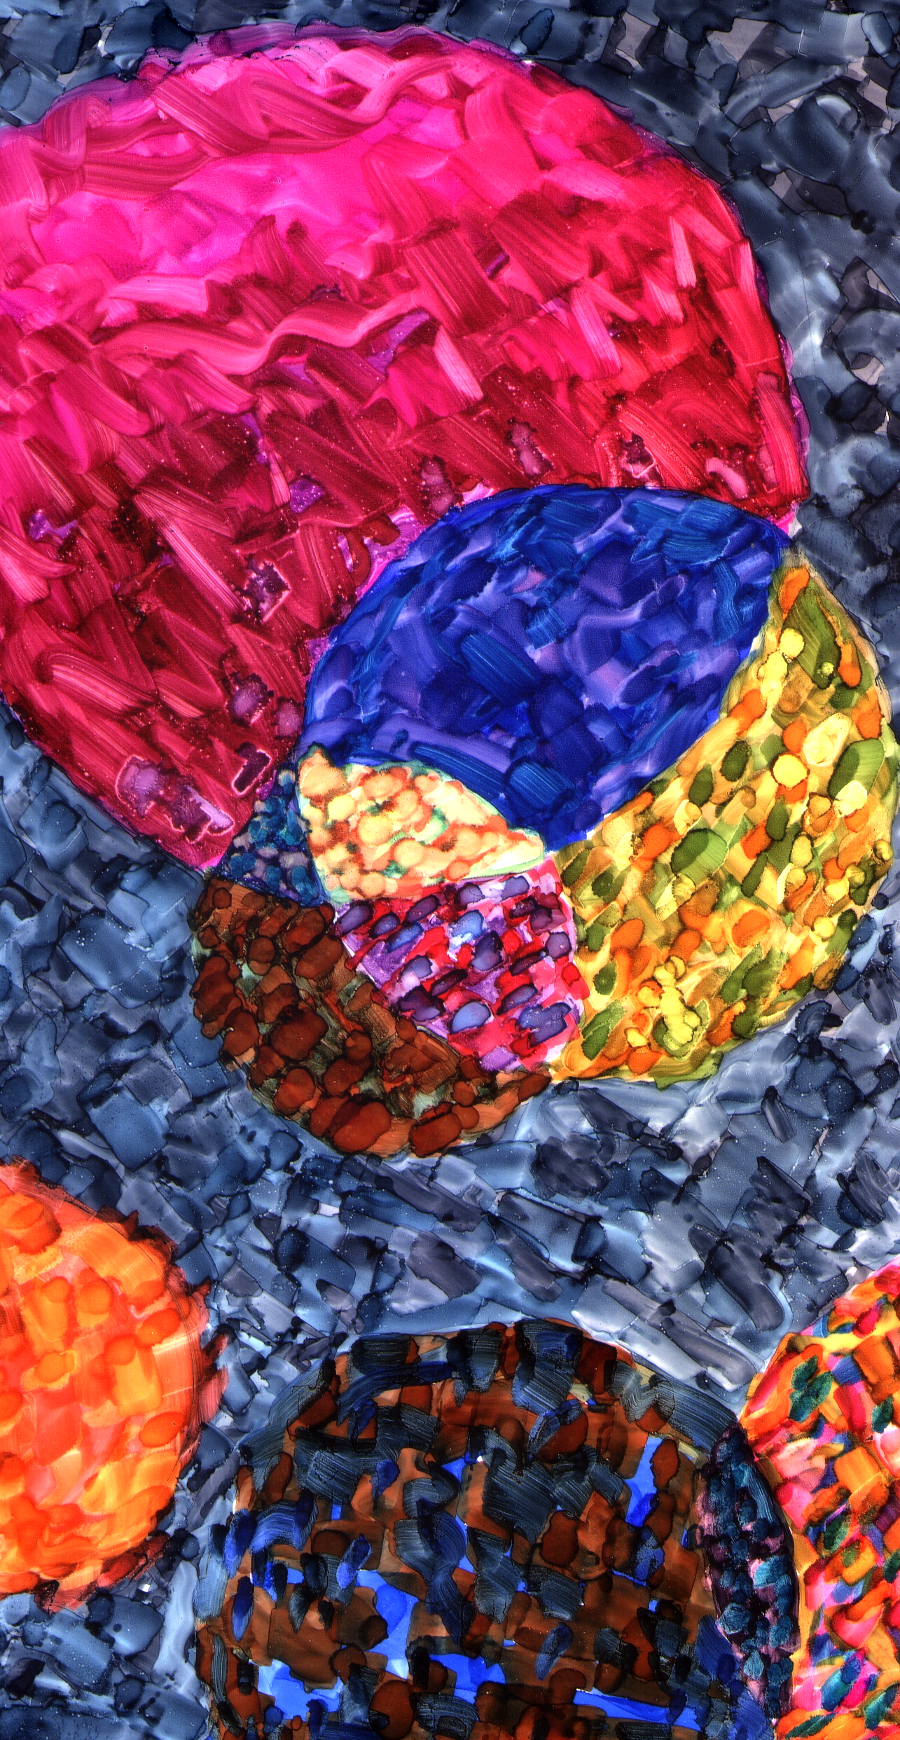
The way you use markers can change depending on the technique or even the type of paper used. Markers used on glossy paper dries slowly, allowing lighter colors to lay on top of darks. Students will create art, layering different colors together. Giving off a oil/acrylic paint look.
4 Keeps,
1 Likes,
0 Comments
THE PLAN
1 session; 60 minutes per session
1. SWBAT layer colors on top of each other.
2. SWBAT create artwork using markers on glossy paper.
1. Glossy Paper (photo paper or cardstock)
2. Markers (alcohol-based. Example: Copic and Prismacolor)
***Before trying this project test the paper first. Not all glossy paper will keep the marker ink wet long enough to layer light colors over dark. To test this out lay down a dark color first then after a minute or two lay down a lighter color on top. If the lighter color shows up, the paper will work just fine. The paper used for this project was HP Everyday Semi-gloss Photo Paper.
1. Lightly sketch a design on your paper. (If you plan on doing a abstract piece, you can skip this step if you want.)
2. Take your markers and start scribbling and dabbing the ink on the paper section by section. Work fast and loose. The wet ink will spread out pushing other colors out of the way. (Every once in a while scribble on a paper towel to clean off the tips of your markers.)
This is a really fun project that anyone can do. The best part is seeing how the marker ink reacts with the paper when it spreads out.
THE FEATURES
Abstract Art, Abstract Expressionism, Art Deco, Pop Art

Share!
Comment!