This is an introductory lesson I do with students before we make our 3-D figures.
This lesson teaches basic figure drawing and proportion.
14 Keeps,
0 Likes,
0 Comments
THE PLAN
2 sessions; 50 minutes per session
• I can demonstrate proper proportions in my drawings
• I can identify the difference between 2-D and 3-D art and speculate why artists such as Degas created art in both forms
• I can create gesture drawing of figures
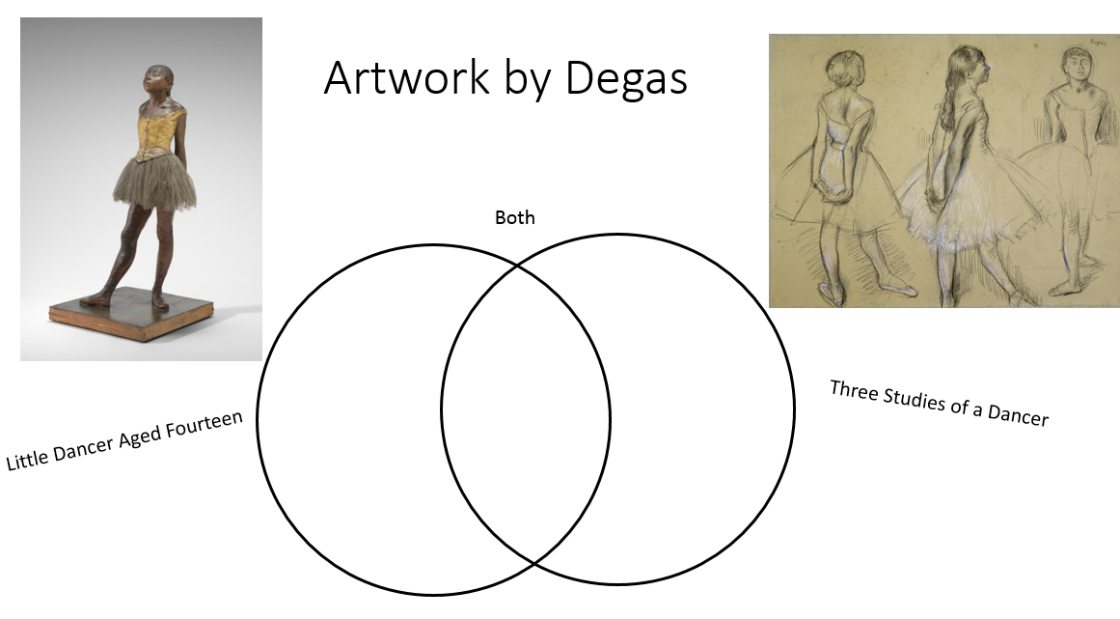
Begin class by sharing two artwork by Degas, Little Dancer Aged Fourteen and Three Studies of a Dancer. Using a Venn diagram, have students record the similarities and differences in the two artworks. Make sure students recognize that the sculpture is 3-D (height, width, and depth) while the drawing is 2-D (height and width). Also have the students speculate about why Degas may have drawn the dancer from three different angles and consider how this relates to the sculpture.
Next, introduce the word gesture. Gesture drawings are quick sketches that capture the movement of a figure. Students will be taught how to make gesture drawings using ovals. In order to successfully create gesture drawings it is also important to understand proportions. Proportion is the relationship of the parts to the whole.
Have students stand up and begin to determine how different body parts relate to each other. Tell students that the average adult person is thought to be about 71/2 heads tall. Using their hands they can estimate how many heads tall they are. Also have students put their hands to their side and determine where their arms touch their legs. Proportion is important to understand when sketching figures in order to depict the figure correctly.
Now that students understand proper proportions, show them how to make a quick sketch (gesture) of a person using ovals. Have students volunteer to be models for this exercise. Show them how some artists use wood mannequins to help them draw correct proportions. Continue having the students practice sketching various poses starting with forward facing view and eventually trying profile views.
Inform students that this exercise is going to help them in their next two project which will include creating a 2-D figure and a 3-D figure.
• Observe students gesture drawings and check for understanding of proper proportions

Share!
Comment!