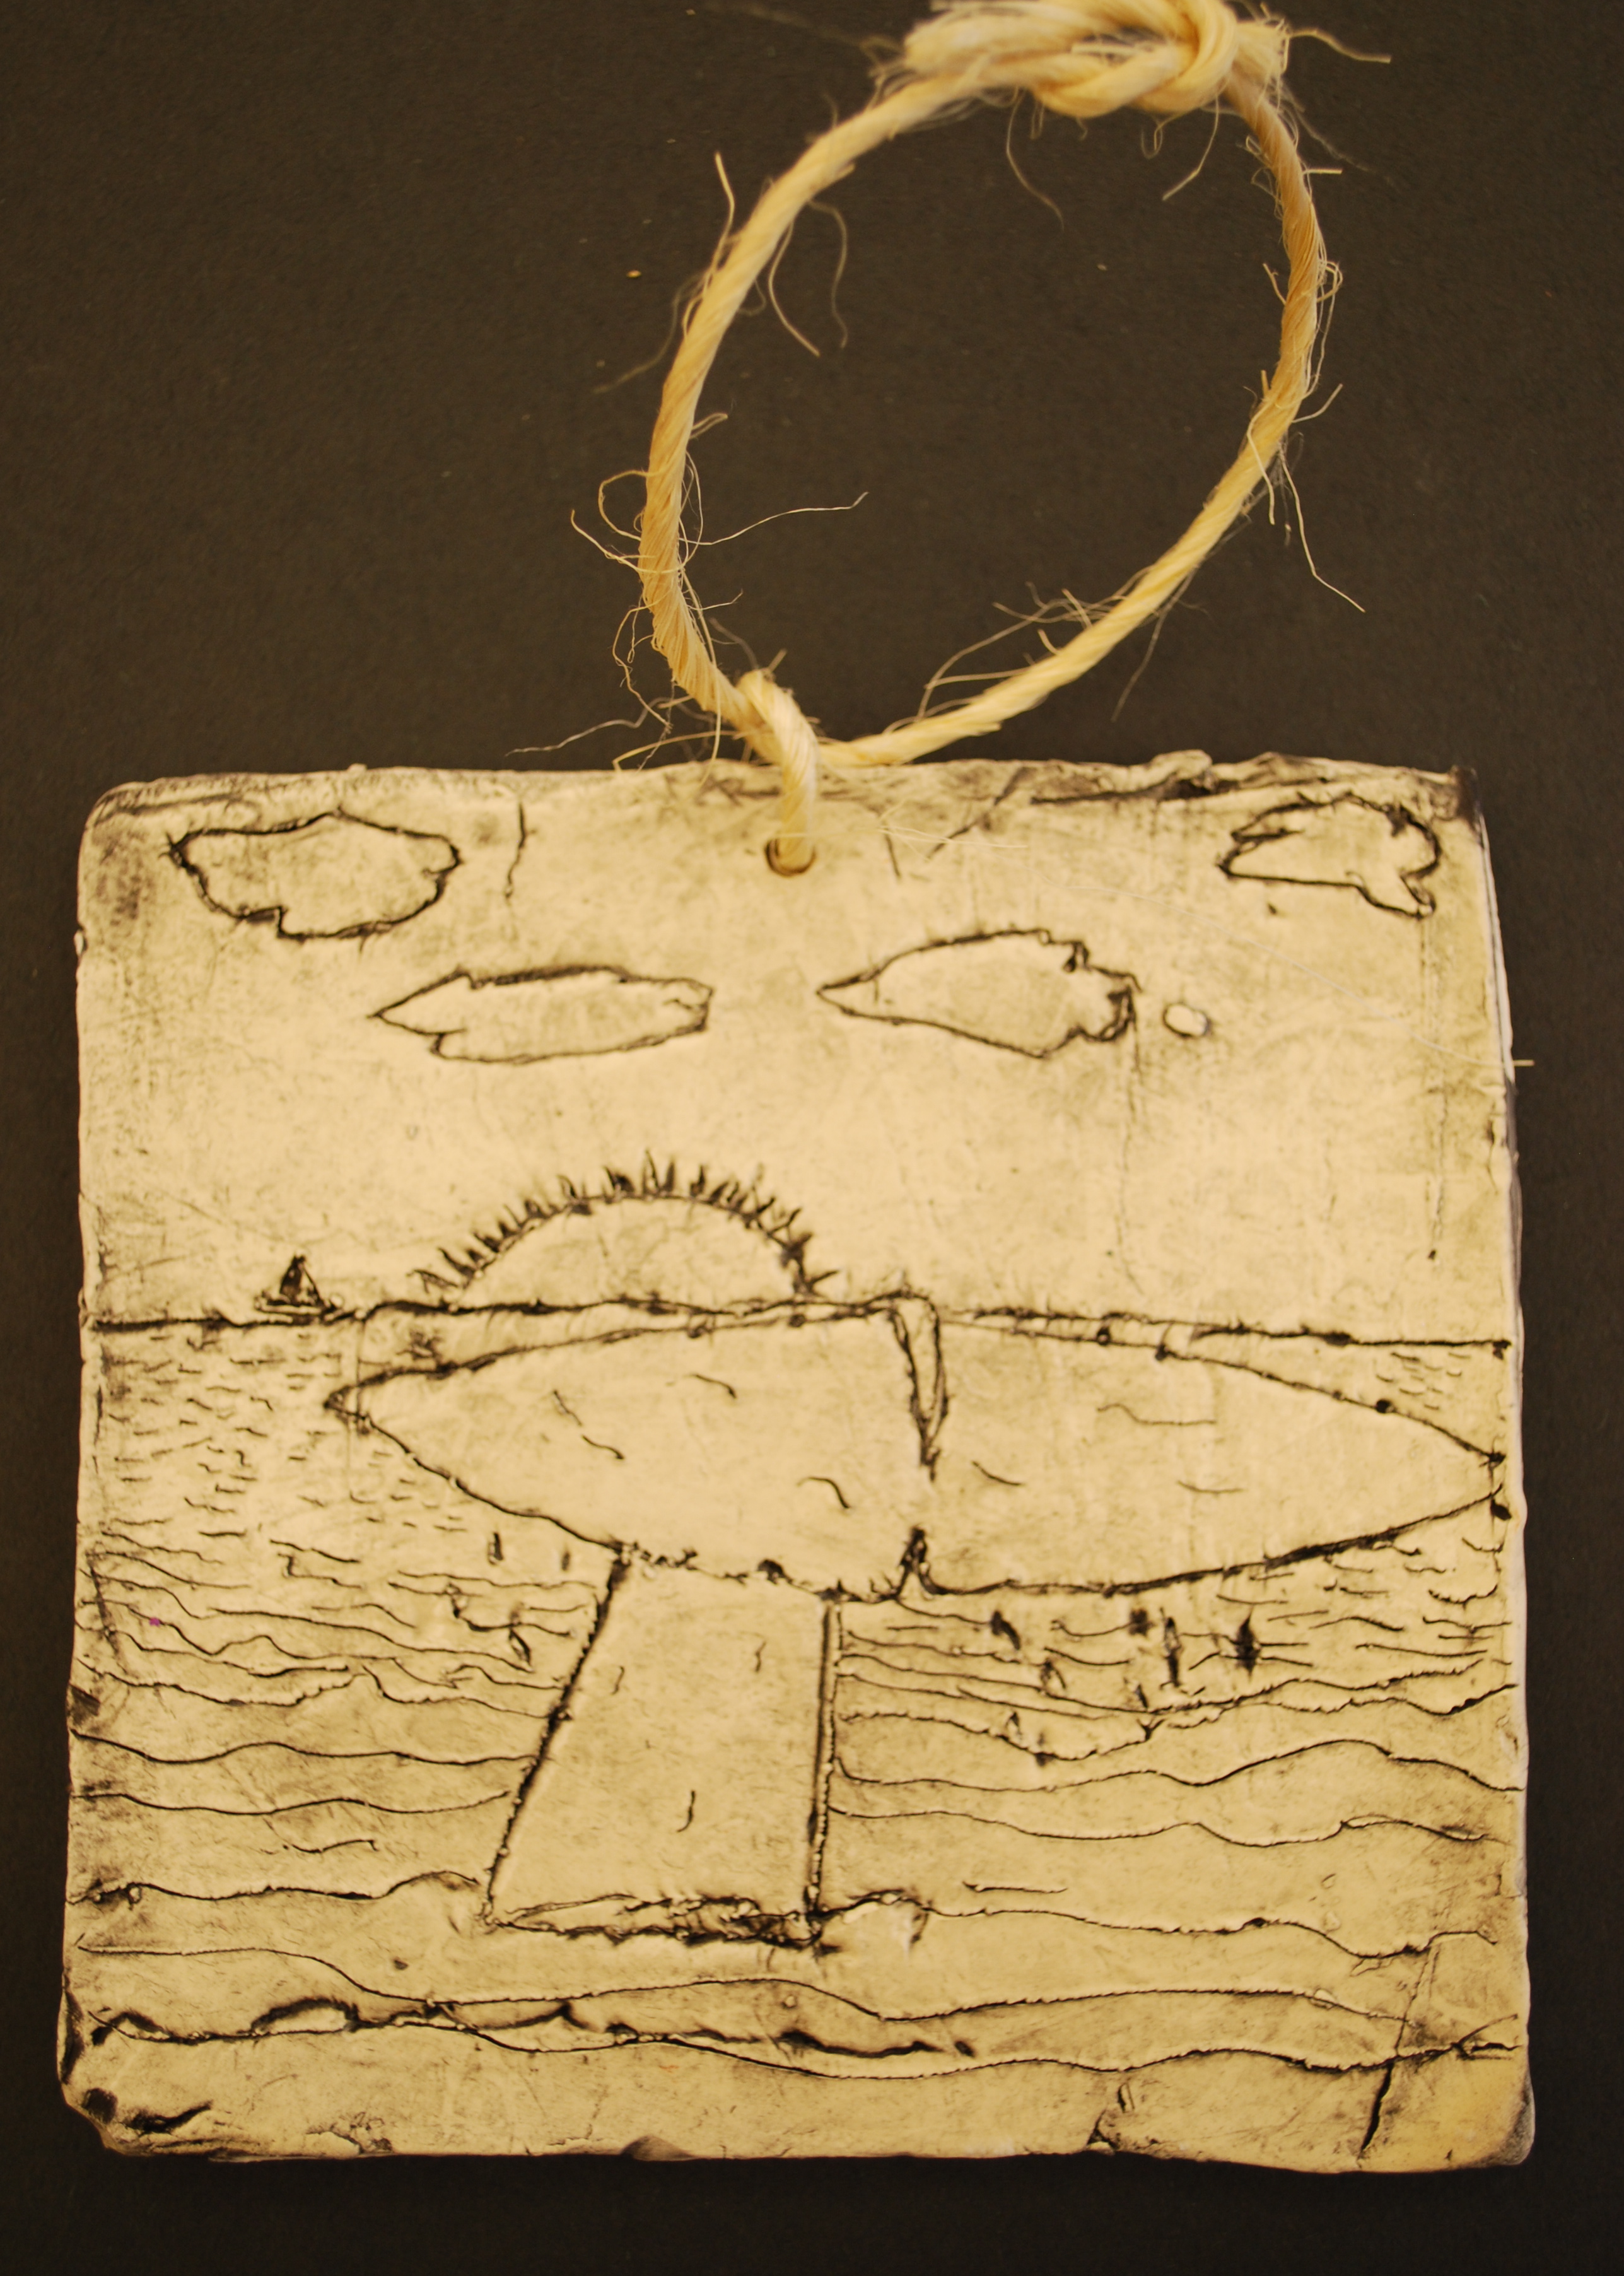
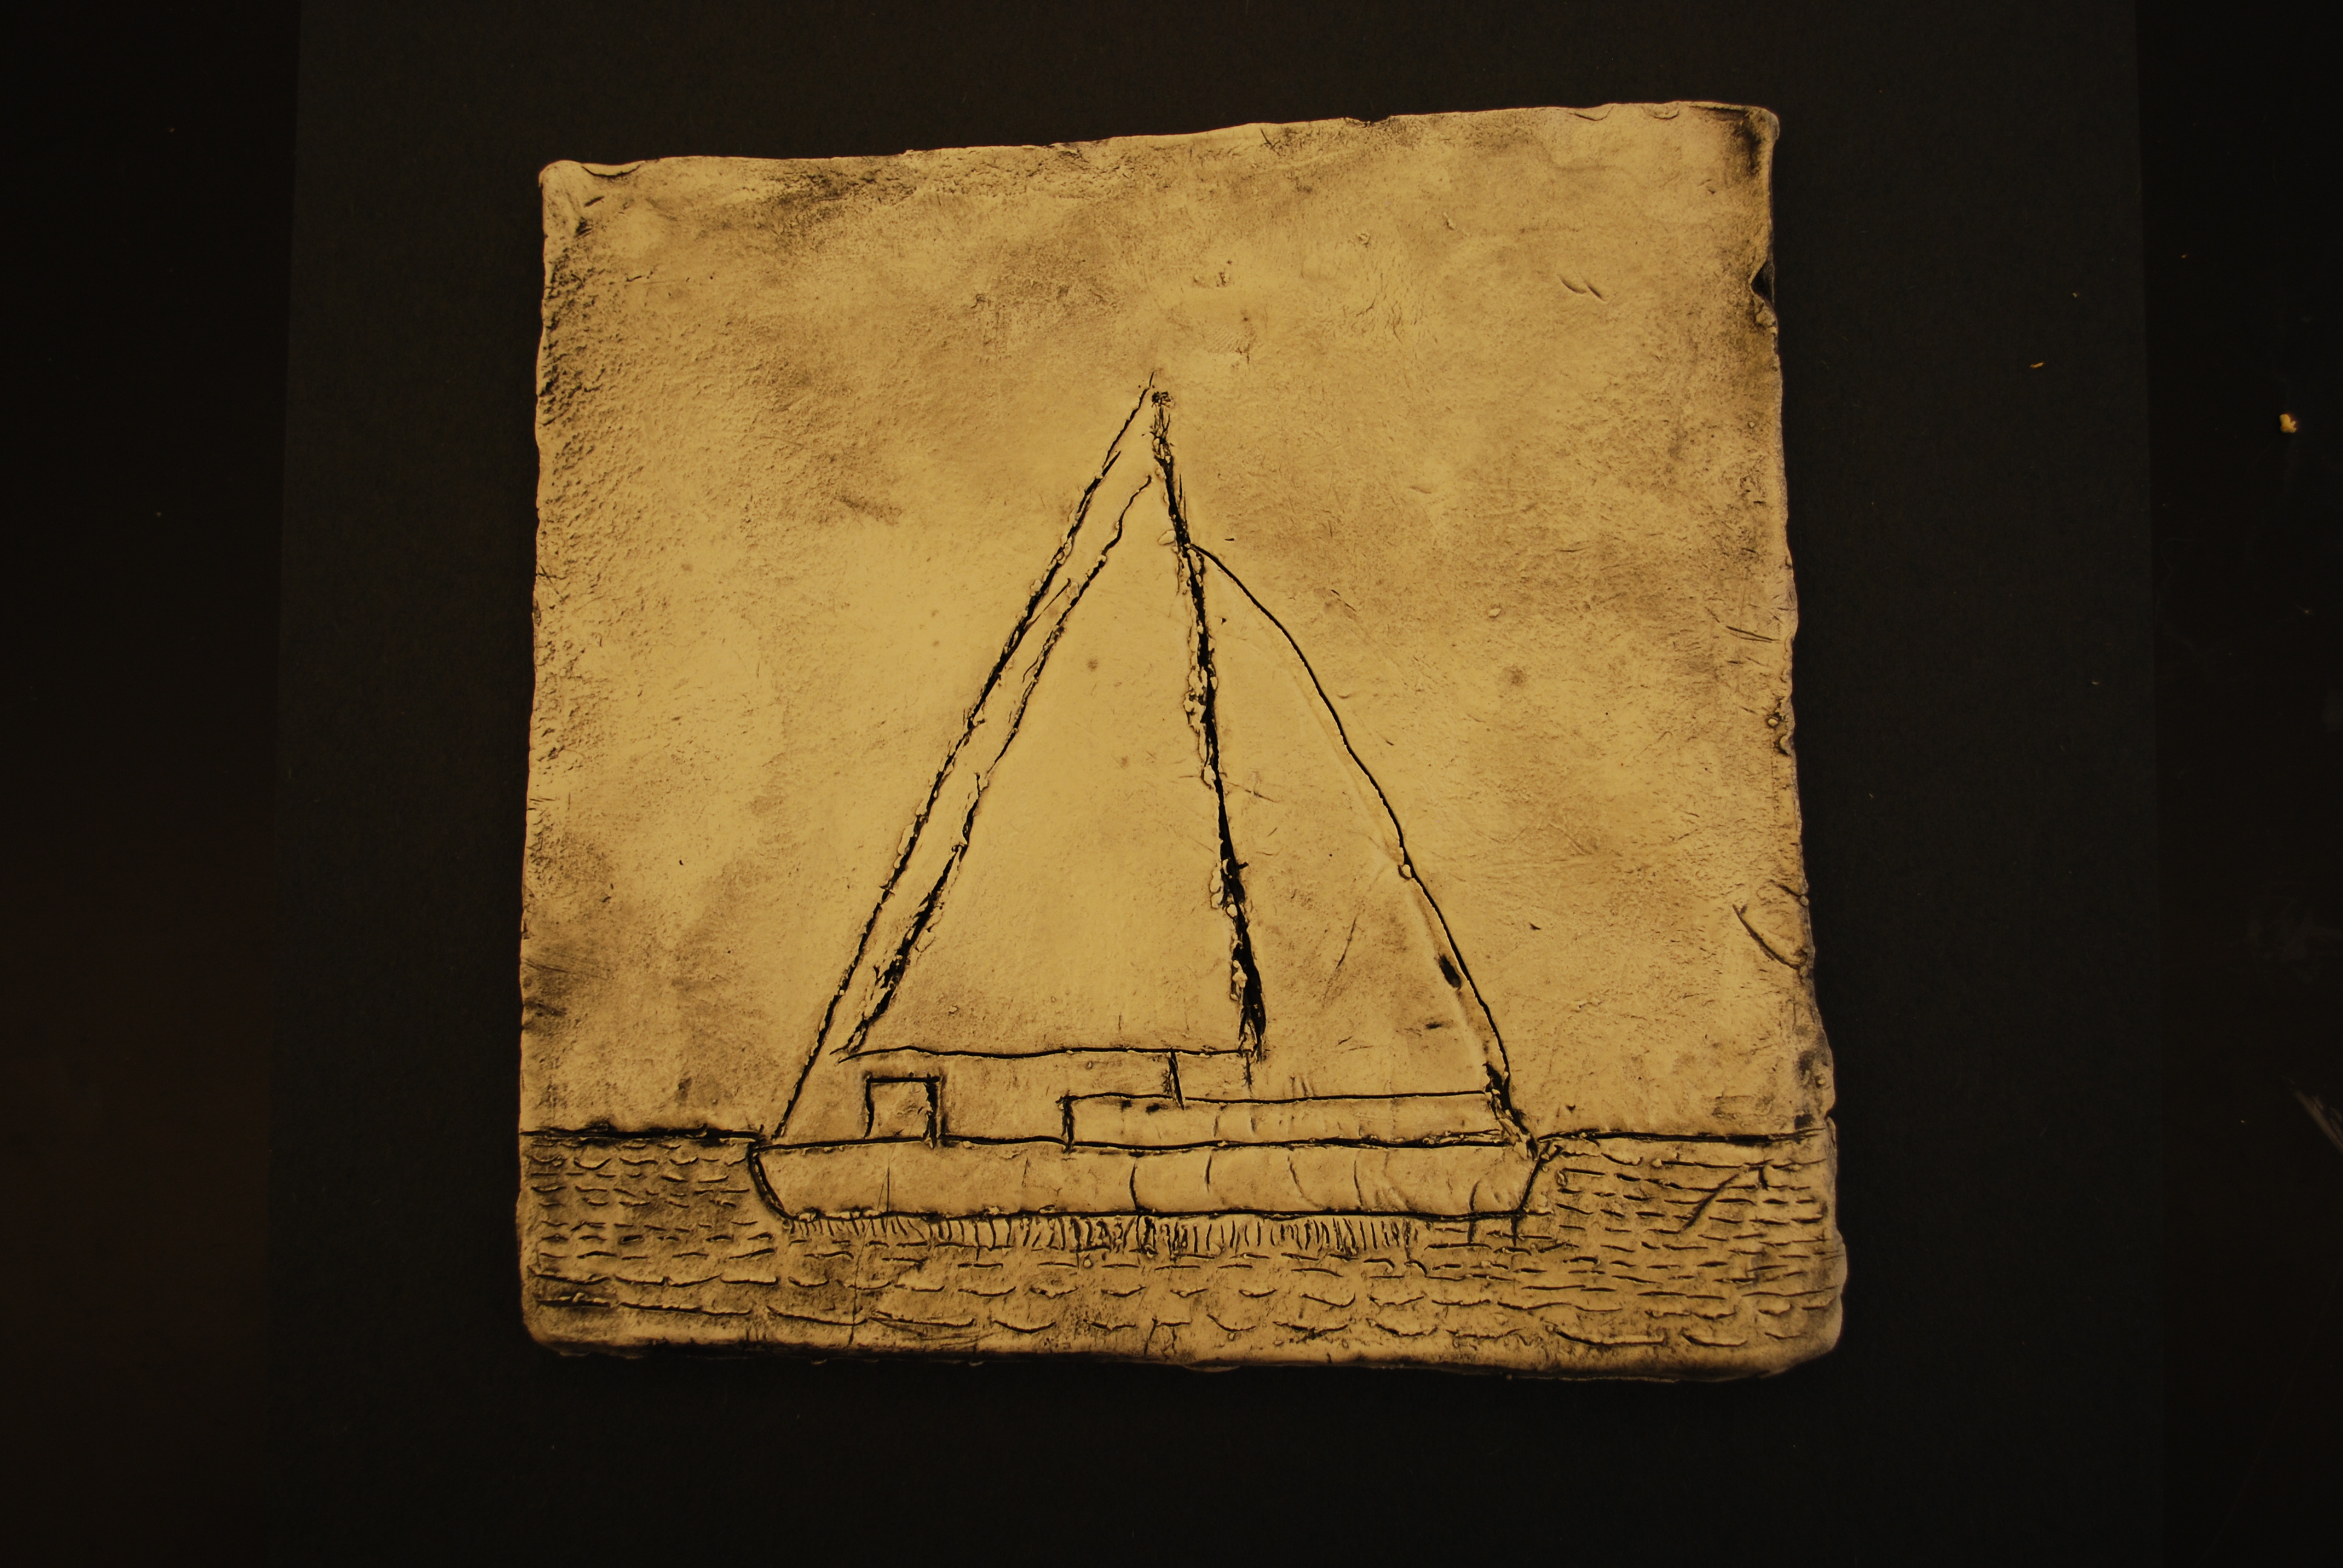
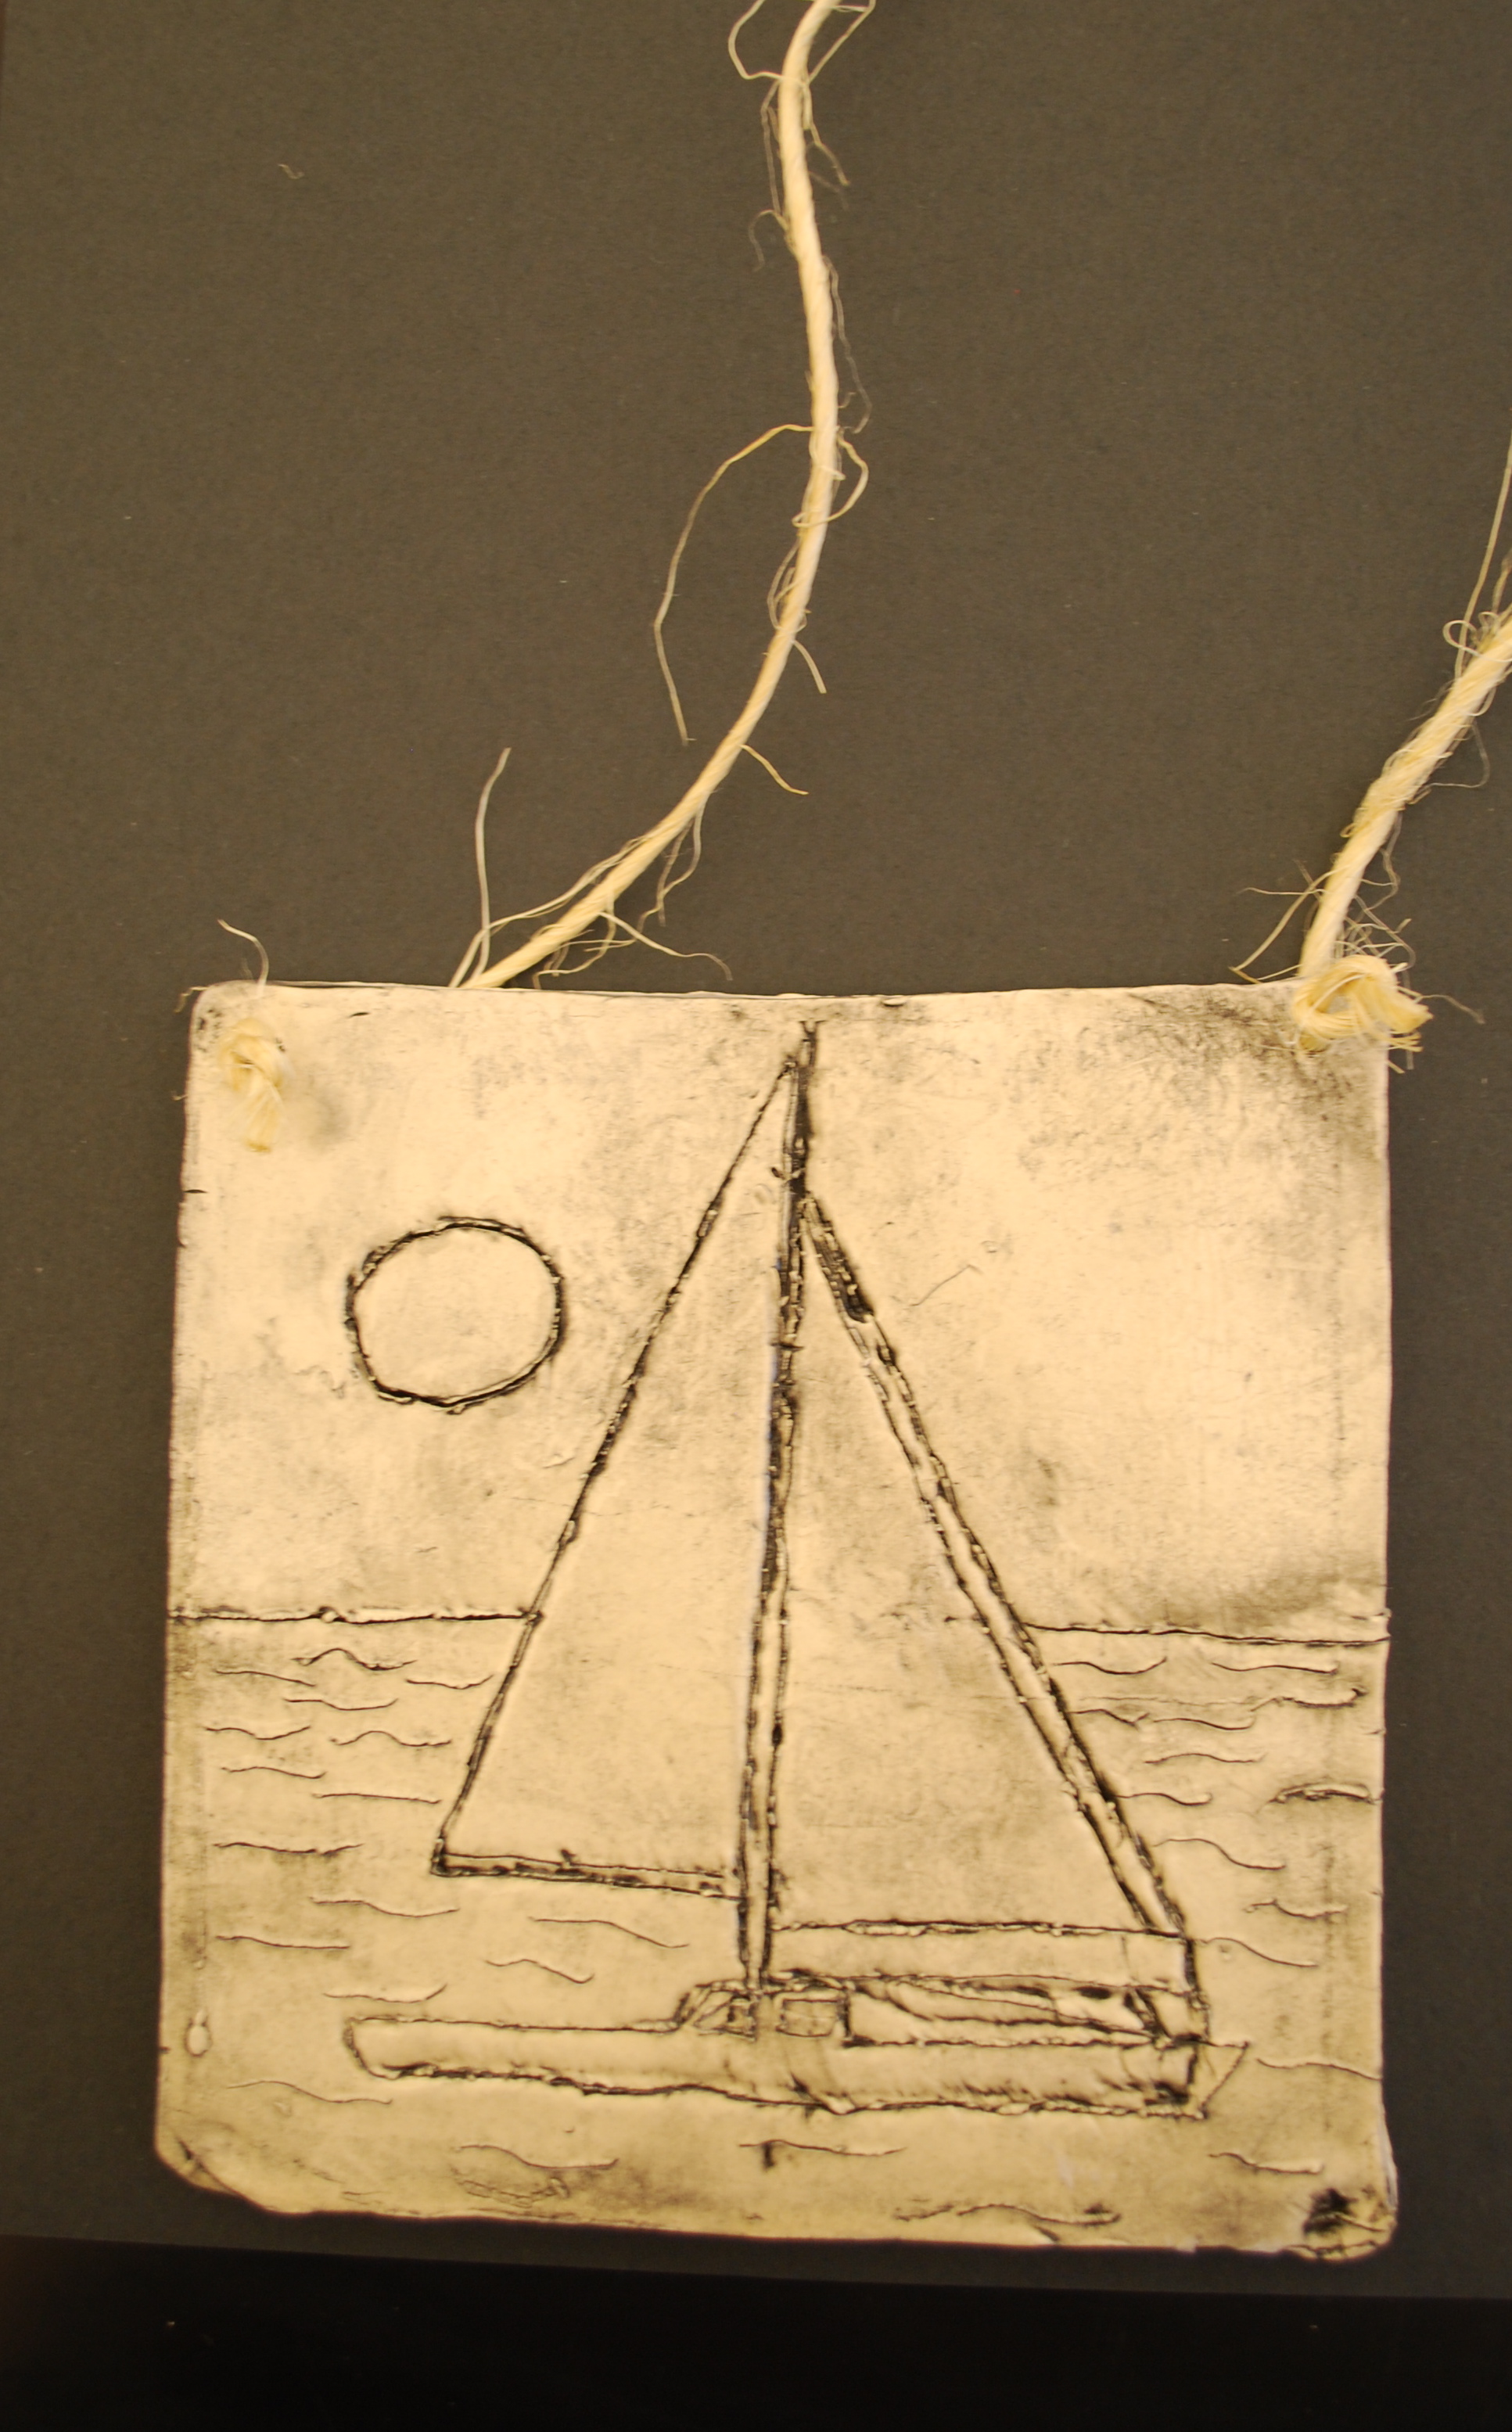
Students are introduced to the art and history of traditional Scrimshaw. Students create a "Scrimshaw" tile using white clay and black underglaze.
9 Keeps,
2 Likes,
2 Comments
THE PLAN
4 sessions; 45 minutes per session
1. Students will become familiar with the art of Scrimshaw and its relation to American whaling history. 2. Students will understand the term nautical and will create their art using a nautical theme.
3. Students will create a clay tile that replicates the process of Scrimshaw.
1. 6"x6" tracing paper
2. Pencils and erasers
3. Handouts of pictures of boats, sea mammals, lighthouses and other nautical images.
4. White low fire clay, rolled into slabs and cut into 6"x6" tiles.
5. Common Pins
6. Black underglaze
7. Damp sponges
8. Clear glaze
9. (Optional) twine
1. Introduce students to the art of scrimshaw by showing a PPT (attached) of examples. Discuss the history of Scrimshaw and it's relation to American whaling history.
2. Show YouTube video: Curiosity Shop: Scrimshaw.
3. Pass out images of nautical themes.
4. Have students draw a picture, using pencil, of a nautical image on the tracing paper squares. (detail is not necessary at this point).
5. Have students place the tracing paper over the (wet) clay square tile.
6. Use a dull pencil to trace over the drawing. The lines will transfer to the clay.
7. Remove the paper.
8. Use the common pin to carefully trace the design onto the clay. Be careful not to cut too deeply in the clay as it may split during firing if you do.
9. Use the pin to create shading by scratching hatching or cross-hatching lines.
10. Dry tiles slowly and fire when completely dry.
11. Use stiff brushes to apply a thin coat of black underglaze to the fired tiles. (Scrub it into the etched lines).
12. Use damp sponges to remove the black underglaze from the surface of the tile. The black will remain in the etched lines creating the look of scrimshaw.
13. Apply a coat of clear glaze and fire again.
1.Does the student's work demonstrate an understanding of the tradition of Scrimshaw?
2. Does the student's work use a nautical theme?
3. Does the student's work demonstrate good craftsmanship and proficiency in the use of materials?
Optional: Use a drinking straw to punch two holes in the wet clay and string the twine so that it can be hung.
THE STANDARDS
Visual Arts Standard 1: Understanding and applying media, techniques, and processes
[5-8] Students intentionally take advantage of the qualities and characteristics of art media, techniques, and processes to enhance communication of their experiences and ideas
Visual Arts Standard 3: Choosing and evaluating a range of subject matter, symbols, and ideas
[5-8] Students use subjects, themes, and symbols that demonstrate knowledge of contexts, values, and aesthetics that communicate intended meaning in artworks
Visual Arts Standard 4: Understanding the visual arts in relation to history and cultures
[5-8] Students analyze, describe, and demonstrate how factors of time and place (such as climate, resources, ideas, and technology) influence visual characteristics that give meaning and value to a work of art
[5-8] Students describe and place a variety of art objects in historical and cultural contexts
THE FEATURES
American Art, Folk Art
Line, Texture, Contrast
Ceramics
History/Social Studies
April_Hallock05/27/2013 at 01:52pm
Great technique for kids to learn. They love carving!
myrnavel02/10/2016 at 05:38am
It says there is a ppt attached; however, I don't see one. (??)
You must be logged in to keep, like, or comment on this resource.


Share!
Comment!