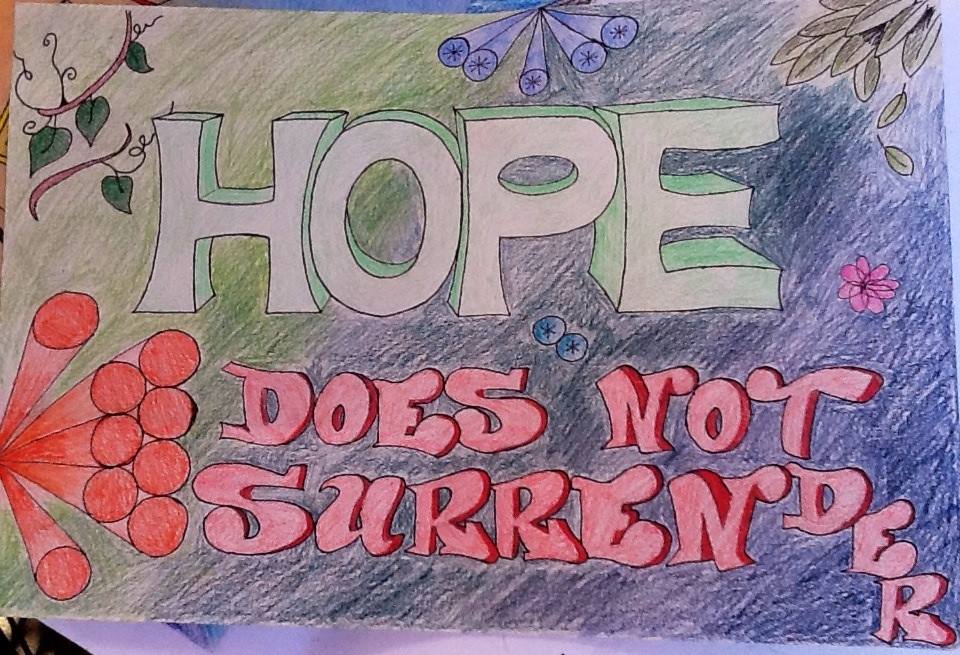
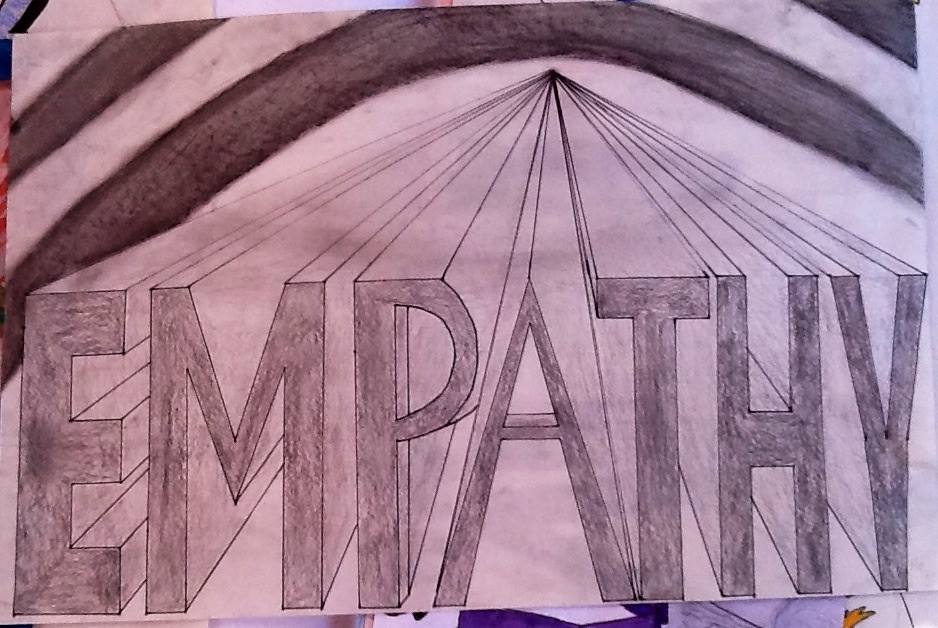
Students will utilize one point perspective and create a powerful, or fierce, word, or words, in 3D letters.
9 Keeps,
1 Likes,
0 Comments
THE PLAN
5 sessions; 50 minutes per session
1. Students will learn to use a ruler and hold a pencil properly for ruling lines.
2. Students will learn to use a vanishing point, a base line, an ascending line and converging lines.
3. Students will draw 3d block letters using one point perspective.
1. White Paper, 12"x18" or larger
2. Pencil and eraser
3. 18" ruler
3. Ultra Fine point "sharpie' or fine felt tip marker.
4. Colored Pencils, chalk pastels, markers
1. Handout of block letter alphabet (from "Google" images.)
2. As a warm up (Do-Now) students practice copying letter shapes.
3. Pass out paper, remind students to print their name on the back, bottom corner, small.
4. Pass out rulers.
5. Demonstrate locating a vanishing point about 1" below the edge of the paper. Demonstrate ruling the ascender line about 4" below the edge of the paper and the baseline about 3" below the ascender line. Once students get the hang of it, they might make their letters bigger or smaller and change those measurements.
6. Demonstrate lightly spacing in the letters before you commit to their placement.
7. Demonstrate blocking in a letter from baseline to the ascender line. The letter MUST touch both guidelines.
6. Develop each letter so all parts of a letter are the same width or thickness.
7. Rule converging lines from the corners of the tops of the block letters to the vanishing point.
8. Rule converging lines from remaining corners in the middle and bottoms of the block letters. When a converging line meets another letter, or line-STOP- do not draw over a letter.
9. Draw the side of the letter on the diagonal converging line, and the back of the letter is PARALLEL to the front of the letter.
10. Draw straight letters first. Round letters are trickier-- the line for the back of the letter begins on the front of the letter, moves back like a crescent moon and closes on the front of the letter again.
11. Outline with ultra fine point "Sharpie" pen. Erase all the guidelines.
12. Add value-- front of letter is a light value, sides of letter are a medium or dark value. Students may experiment with making a gradation in the shaded parts.
13. A background is added to add meaning to the word- abstract, pattern, or illustrative.
1. Block letters are drawn using guidelines.
2. 1 Point perspective is used to create the illusion of 3D.
3. Guidelines are erased and letters are clearly outlined.
4. Values are applied to letters, background is added using same or mixed media.
This was a successful project for most students, especially those still fearful of "drawing". That said, those who didn't have the patience for precision were still rewarded with 3d letters, and they were all excited to learn how to "do it". In my research, I shared that LINEAR perspective was invented during the renaissance, about 500 years ago, and its only the modern artists who "eyeball" it.
THE STANDARDS
Visual Arts Standard 1: Understanding and applying media, techniques, and processes
[9-12 Proficient] Students conceive and create works of visual art that demonstrate an understanding of how the communication of their ideas relates to the media, techniques, and processes they use
Visual Arts Standard 2: Using knowledge of structures and functions
[9-12 Proficient] Students evaluate the effectiveness of artworks in terms of organizational structures and functions
THE FEATURES
Pop Art
Color/Value, Emphasis, Form, Line, Proportion/Size, Shape, Space
Colored Pencil, Drawing, Graffiti, Marker, Pencil
English/Language Arts
You must be logged in to keep, like, or comment on this resource.

Share!
Comment!